Three simple techniques for fixing product labels in post-production


One of the most important aspects of product photography is ensuring that the branding is prominently featured for your client. They are the star subject of the shoot after all!
Occasionally during the creative process of the shoot, labels and pack shots can become obscured or not be clearly identifiable. The end results might depict an off-centre or misaligned product label or a blown out one where the exposure and focus make it hard to read.
It can be disappointing if you discover some minor issues with the branding or labels once you import your images for editing but don't worry, it's not too late to fix it!
Let's run you through some clever workarounds of these most common problems.
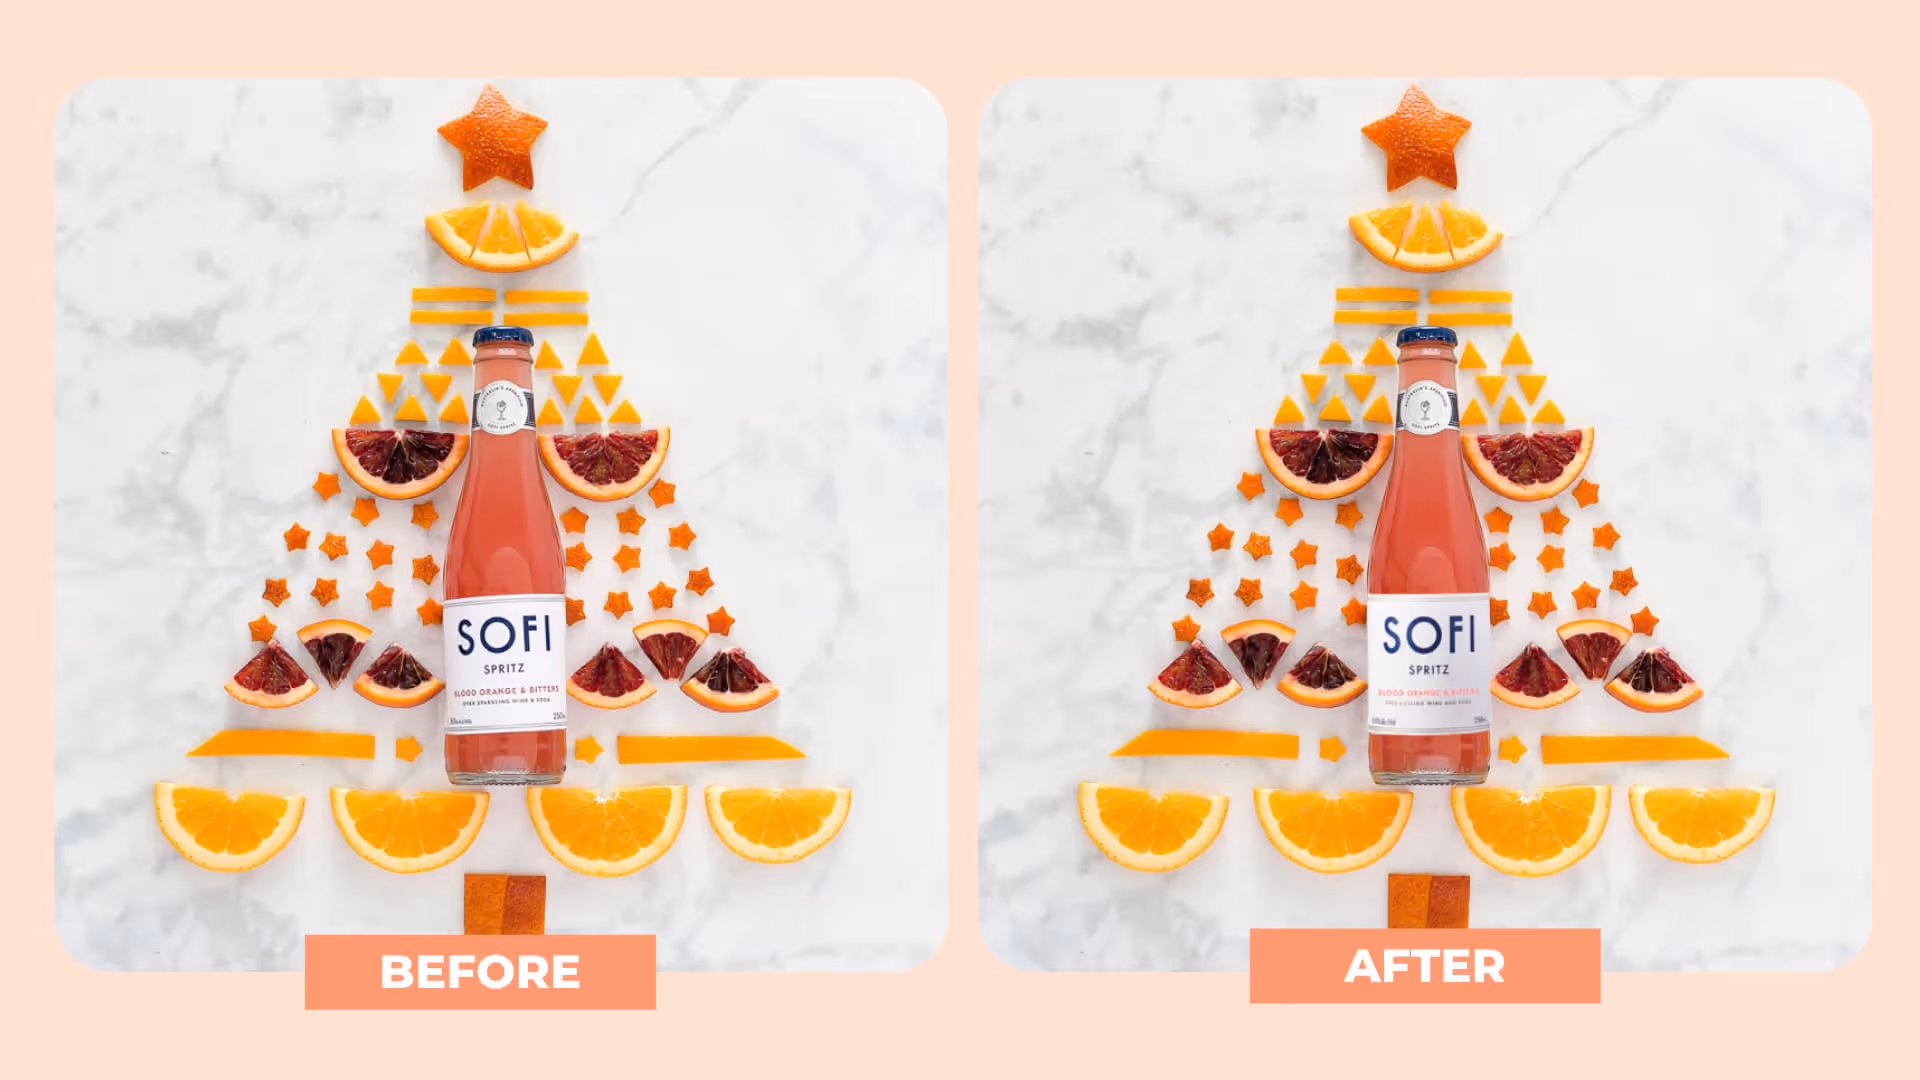
How to recenter product labels
Need your product's branding to be front and centre? If you didn't quite get it lined up in the shoot there is a way you can salvage the image with this editing technique. You'll just need to source a good quality image of the product label (or take one yourself!) that you can replace it with.
Cut & paste from a reference image
Import both the original image and reference image (with the front-facing label) into Photoshop. Make a selection around the label with your favourite Selection Tool and hit CTRL+J (Win) or CMD+J (Mac) to create a cut-out on a new separate layer.
Position, resize, and align the label
Hit V on the keyboard to quickly switch to the Move Tool. With the Move Tool, simply drag the label to position, resize and align it to the product. Match the size by using the original label as a reference.
Cleaning up the edges
As you can see we have selected other areas apart from the label. To remove those extra bits, create a layer mask and use a black brush to remove them.
Removing the original label
Just because a large part of the original label is now replaced with the new one, we only have to remove a small portion of it. This can be done quickly with the Clone Stamp Tool. Hold Alt(Win) or Opt(Mac) and click to sample an area nearby then simply paint away!
Match the lighting
From this image we know for sure that the light is from the left window but the new label is the other way around. To match the lighting, we simply need to recreate the highlights and shadows. To do this, create 2 new empty layers.
On the first layer (highlight), set the Blending Mode to Linear Light and the second layer (shadow) to Multiply. Create a clipping mask on both the layers by holding Alt(Win) or Opt(Mac) and click on the layer below it. Use a bright-coloured brush for the highlights and dark-coloured brush for shadows. Adjust the fill to blend.
Saving blown out or hard-to-read print on product labels
Labels are notoriously tricky to photograph - especially when they are on shiny surfaces and have lots of fine printed text that you need to be able to read. If you've lost detail on your label due to reflections or over-exposure there are some Photoshop tools that you can employ to help sharpen the detail and add some much-needed contrast.
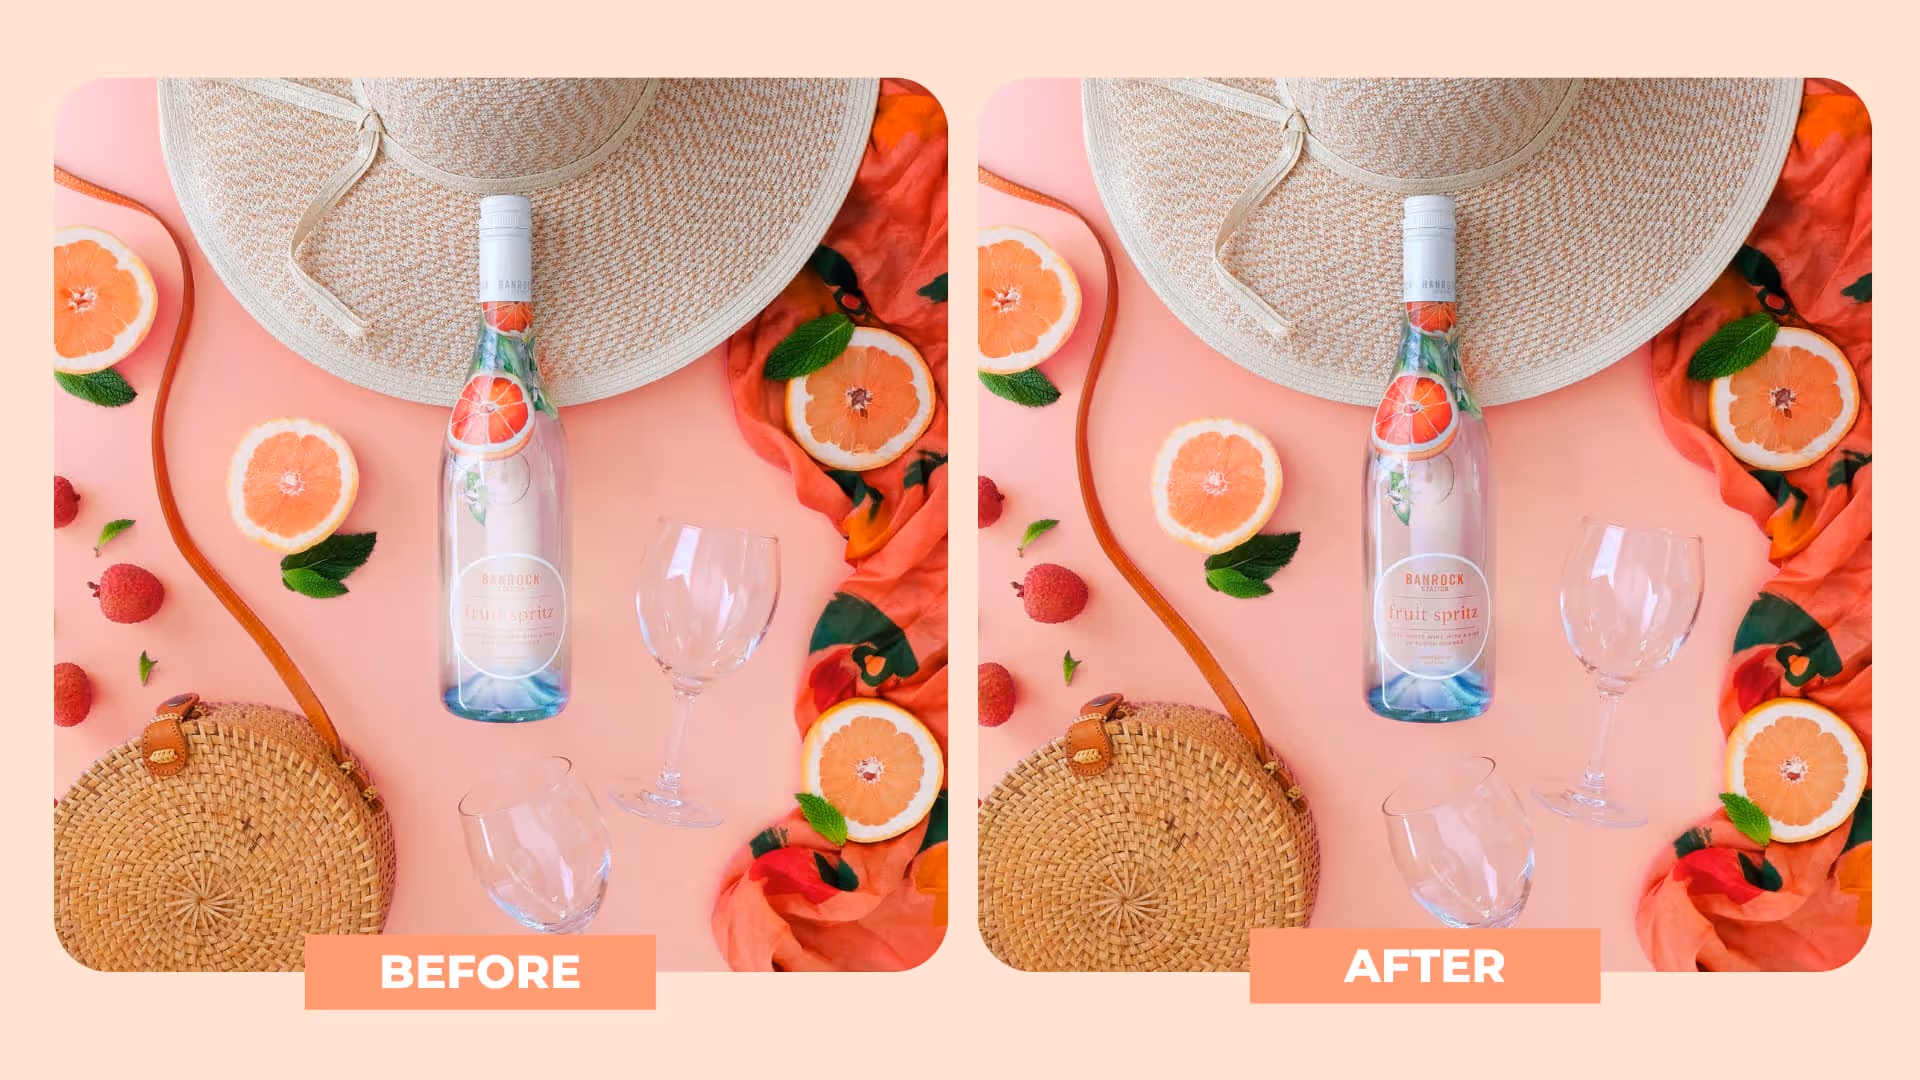
Create a duplicate of the original image
Start by duplicating your original image by pressing CTRL+J (Win) or CMD+J (Mac), this allows you to edit the image on a separate layer and have a more convenient way to quickly reference the original photo.
Use Dodge and Burn to bring back the missing details
These handy tools can help you darken or lighten specific tonal groups in your image.
To put it simply:
- Dodging: Brightening part of a photograph
- Burning: Darkening part of a photograph
As we can see from the photo, the label is slightly blown and the loss of detail is making it hard to read the text. To darken, we'll use the Burn Tool and we will start by darkening the just the Shadows on the image, this means only the darkest tones will be affected by the tool. Select Shadows in the Range drop-down menu then brush over the label.
Once this is done, we will darken the Midtones to create more contrast and reduce the highlights all the way up the bottle. It is best to keep the exposure setting low so you can gradually build up the colour.
Dodge
To make the branding look more realistic you can use the Dodge Tool to brighten up the label and replicate the original contrast. Select the Dodge Tool from the side toolbar. Then change the Range to Midtones as we only want to brighten up the midtones in the image then simply select a suitable brush size and brush over the middle of the label. This makes the label less flat by creating depth with Highlights and Shadows.
[#cta]
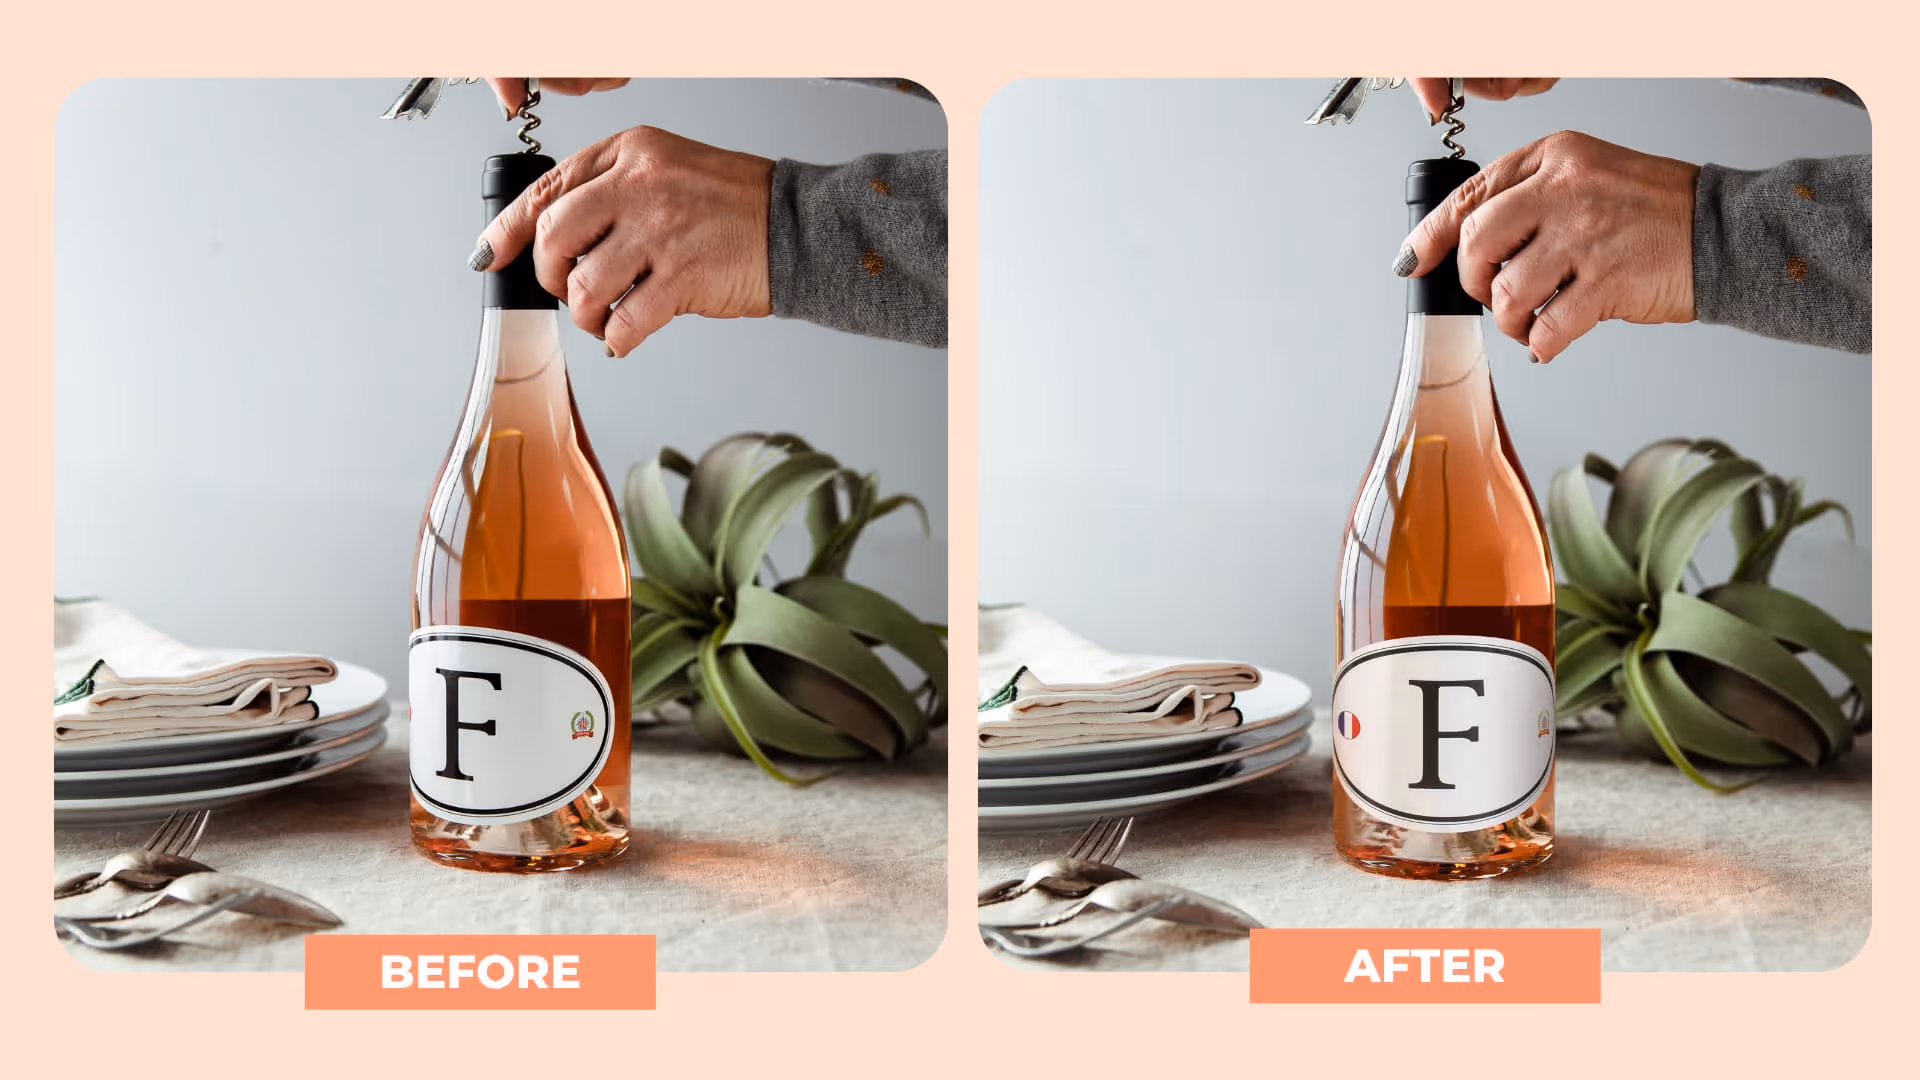
Re-aligning and straightening uneven labels
You can do everything right on shoot and still end up with a wonky label when they aren't applied correctly to the packaging to begin with. Rather than have a misaligned label affecting the outcome of your shoot you can use this quick fix to straighten it up in post.
Separate the label from the bottle
This is a super quick and easy way to straighten misaligned labels. Start by importing the original image with misaligned label into Photoshop. Once it's in Photoshop, use the Object Selection Tool and make a quick selection around the label. The Object Selection Tool will detect the most prominent object in that area and automatically make a selection. Hit CTRL + J (Win) or CMD + J (Mac) to create a separate layer for the label.
Realign the label using Perspective Warp
The Perspective Warp tool gives you control over changing the perspective in your image and can be used to rotate objects, adjust product angles and quickly straighten objects in a few seconds!
On the separated label layer, select Edit > Perspective Warp. Now, click anywhere on the image to create a perspective grid plane. Click and drag at each corner of the grid plane to line them up with the misaligned label. Once they are all lined up, hit Enter to confirm the selection.
Perfect looking labels every time
Next, simply click and drag the corners so they all form a straight line and are aligned with the bottle.
While Photoshop can save you when encountering these problems, it's always good to make it a habit to have attention to every detail during your product shoot. This way you'll save more time and effort in fixing labels.
If you're encountering more problems in product photography, get a quick recap on the basics of photography. Check out common photography problems and how to fix them to learn more.


%20(1).png)
%20(1).png)


