Common photography problems and how to fix them


As photographers, whether pro or beginner, the chances are we still face one of many common photography problems.
Fortunately, for every problem there's a solution! We've put together some of the most common problems and fixes to solve all these headaches.
1. Blurry photos
The most common reason for a blurry photo is an incorrect use of shutter speed. The faster your shutter speed is, the less chance there is for camera shake. This is particularly true when shooting handheld. Here are some of the causes of a blurry photo:
- Improper focus
- Slow shutter speed + natural shaking of one's hands
- Motion blur
- Shallow depth of field
- Insufficient lighting for auto focus to work properly
How to fix?
Improper focus
Most photographers leave their focus point in the middle and use the focus then recompose method of shooting. This means that the photographer uses the middle focus point and aims it at the subject then holds down the shutter button half-way as he/she recomposes the photo to the proper framing for the picture, and then presses the shutter all the way down to capture the shot.
This may lead to blurry photos when there's a shift of camera angle while recomposing the shot.
If you need to use the focus then recompose method because your camera doesn't have a focus point for where you want to focus, use great care not to move the camera around too much which may alter the plane of focus. If you have enough autofocus points in your camera, moving the focus point around to match your composition is the preferred method.
Slow shutter speed + natural shaking of one's hands
Slow shutter speeds are usually used when there's insufficient lighting. When using slow shutter speeds, the natural shaking of one's hands can cause blur in the photo.
To fix this, try to keep your shutter speed at 1/(the focal length of the lens). So if you're using a 50mm lens, then your shutter speed should be at least 1/50. This is a general rule, and obviously only works when the subject that you're shooting is still. Best practice is still to use a tripod and a remote trigger when shooting in slow shutter speeds.
Motion blur
This is often caused by not using the right shutter speed to match the situation. For example, when you're shooting a moving subject like a baby, you'll want a shutter speed of at least 1/200 to freeze the motion in the scene.
In general, you'll want a shutter speed of at least 1/125. For slight movement (eg. a walking model), a shutter speed of 1/320 will often be sufficient. For fast motion like sports, 1/1000 is generally enough to freeze the motion.
Shallow depth of field
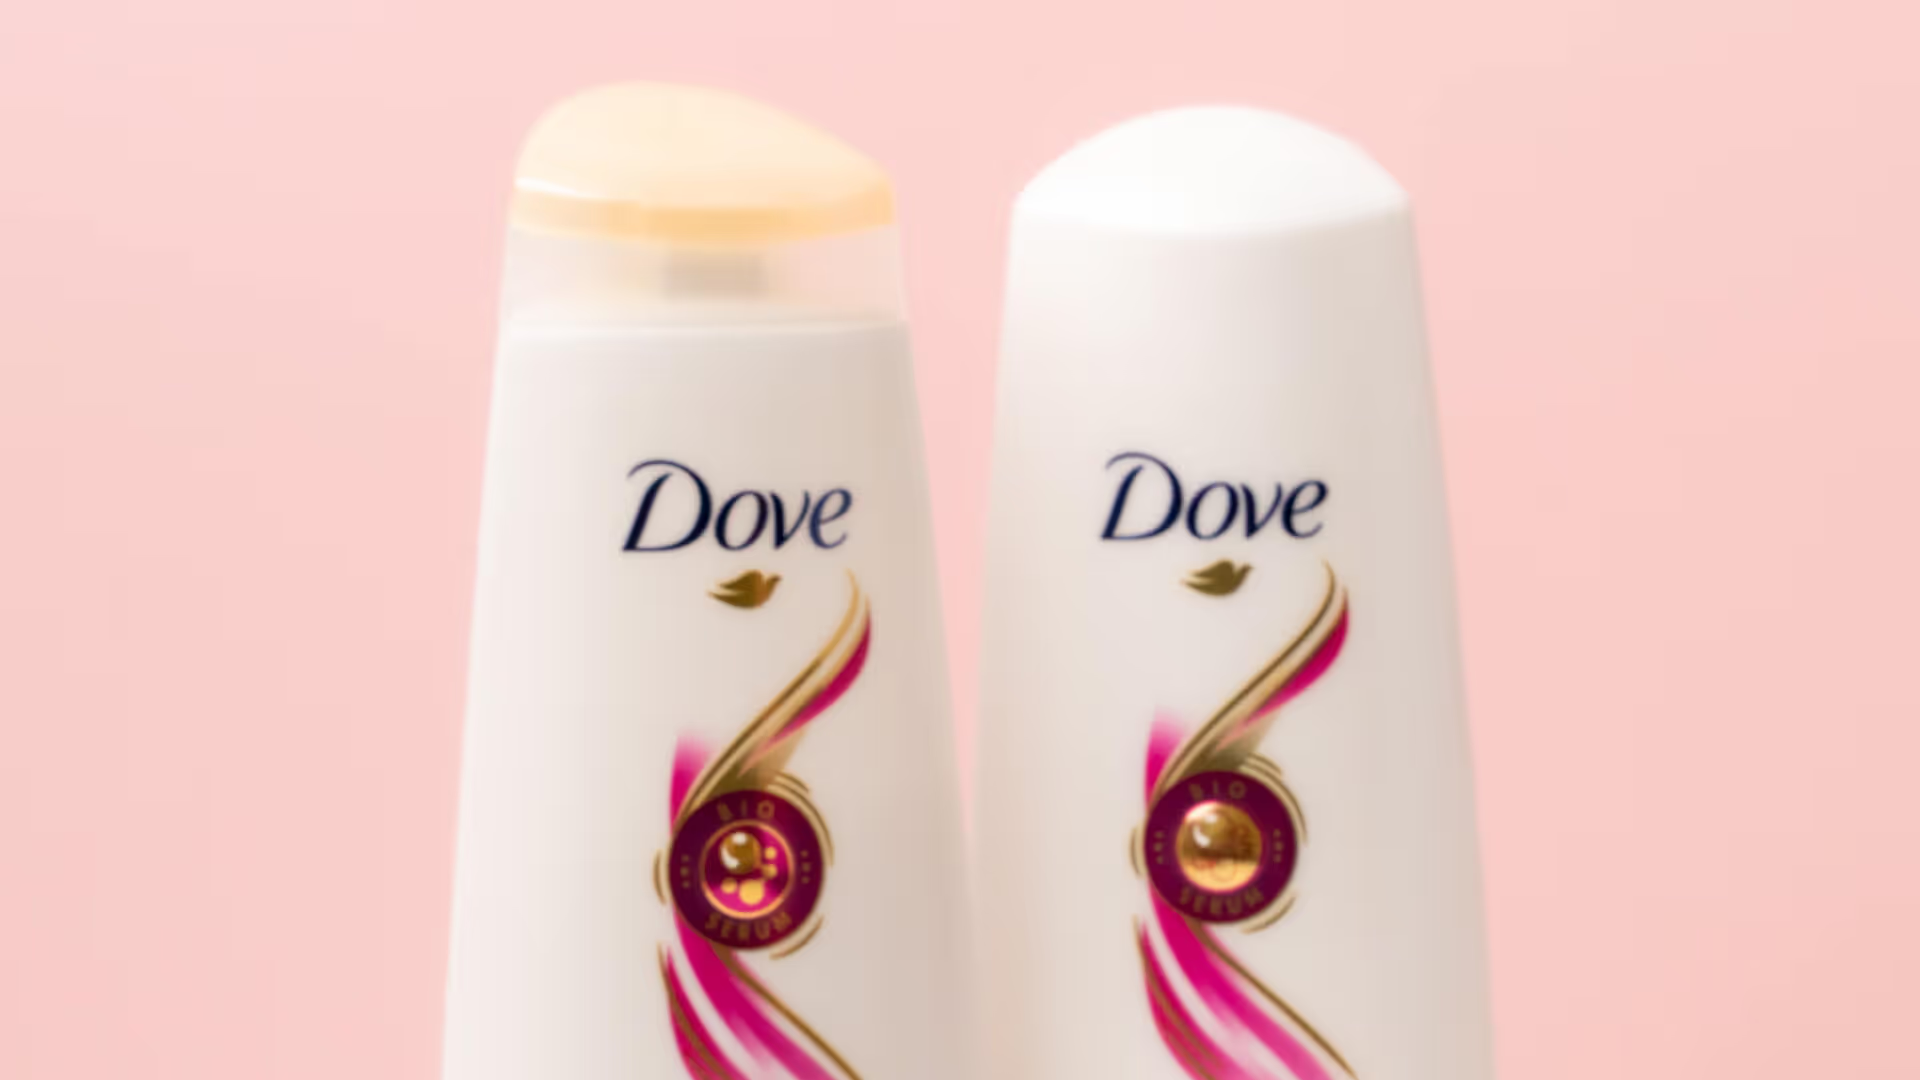
We all want that creamy blur background in our photos. If you use a very low aperture such as f/1.8, and you use a long lens and stand close to the subject, then your depth-of-field will be razor thin.
For example, when shooting a shampoo bottle the photo will show the focus point of the bottle (which is usually the middle where the brand's logo is) in focus, but the rest of the bottle will be out of the plane of focus. In general, it is advisable to increase your depth-of-field just slightly (f/4-f/11) in these situations so that the entire bottle is in focus.
Insufficient lighting for auto focus to work properly
When shooting in low light, the auto focus system tends to struggle to lock focus on a subject because the camera can't see well enough in the dark to know where to focus.
To tackle this problem, we suggest to set up the shooting scene to be in a well lit area if you're shooting indoors (eg. beside a window). If there's no window to be found, you could bump up the ISO in the camera. By doing this, you will end up with an image with a lot of noise but this can be fixed easily in post. If all else fails, manual focus is your best bet!

2. Noisy and grainy photos
This will be due to the fact that you've selected a high ISO setting (>ISO800) to compensate for lack of light or lack of available artificial lights, in an attempt to limit and hopefully avoid image blur/camera shake.
The trade off for reducing blur is that image grain – also referred to as ‘image noise’ – can visibly intrude into our images.
How to fix?
To avoid the ugly, grainy look, manually select a lower ISO setting (less than ISO800) and compensate by placing the camera on a flat steady surface instead of attempting to use it hand held. Best still, of course, use a tripod and put the camera on self-timer or use a remote trigger when shooting so you’re not having to physically press the shutter button to avoid introducing camera blur to the image.

3. Photos too bright or too dark
An overexposed or underexposed photo can be fixed in post-processing, but you should learn to avoid the problem altogether to create beautiful original photographs.
What Is Overexposure?
Overexposure is the result of too much light hitting the sensor. Overexposed photos are too bright, have very little detail in their highlights, and appear washed out.
What Is Underexposure?
Underexposure is the result not enough light hitting camera sensor. Underexposed photos are too dark, have very little detail in their shadows, and appear murky.
What is Correct Exposure?
Exposure is a creative choice and there is no “correct” exposure for any one photograph. How much you expose a photo depends on what mood, emotion, and feeling you hope to convey in your work. Some photographers consider correct exposure to be a natural-looking photograph with balanced both highlights and shadows that don’t result in any lost details. Other photographers might deliberately overexpose or underexpose a photo to obscure unwanted details or convey a specific feeling or emotion.
How to properly expose a photo
- Understand the exposure triangle
The exposure triangle explains how shutter speed, aperture, and ISO work together to take a photo with proper exposure. All three elements affect one another; if you adjust the shutter speed, it affects both the aperture and the ISO. For example, if you open up the aperture to let in more light, you will need to use either a fast shutter speed, or a low ISO to compensate. Understanding how they work together will lead to more properly exposed photographs.
- Use the right ISO
The ISO number determines how sensitive your camera’s sensor is to light. For example, a camera set to ISO 200 is twice as sensitive to light as one with an ISO 100 setting. A low ISO means your camera is less sensitive to light and is better suited to bright situations. A higher ISO means your digital camera becomes more sensitive to light and will take better photos in darker settings.
- ISO 100-200: Best for bright daylight. Results in a crisp image with little grain or noise.
- ISO 200-400: Slightly less ambient light, such as indoors during the daytime or outdoors in the shade.
- ISO 400-800: Indoors, with a flash.
- ISO 800-1600: Low light indoors or at night when you can't use a flash.
- ISO 1600-3200: Extreme low-light conditions without a flash. Your image will have a lot of grain or digital noise because of the low light.
- Use the right shutter speed
The shutter is the device that quickly opens and closes to let light pass onto your camera’s sensor. Shutter speed controls how quickly or slowly this shutter opens and closes.
- When to Use Fast Shutter Speed (>1/125)
A fast shutter speed allows less light into the camera. Use a fast shutter speed in bright lighting conditions, like on a sunny day, to minimize the chance of an overexposed image. You can also use a high shutter speed to create sharp images and freeze movement, like a water splash.
- When to Use Slow Shutter Speed (<1/60)
Slow shutter speeds allow more light into the camera, which makes a slow shutter speed great for nighttime or low light conditions. At these slow speeds, you will need a tripod to avoid camera shake or a blurred image. You can also use a slow shutter speed to create images with blurred movement, like ocean waves that appear as a mist.
- Use the right aperture
Controlling your aperture manually allows you to adjust exposure and image brightness beyond what the automatic settings on your camera will allow. If you are photographing when it is dark, you can select a lower f-stop (<f/2.8) ensuring your image isn’t underexposed. If you are photographing where there is a lot of light, you do the opposite which is to select a higher f-stop (>f/4), which closes the aperture and let lesser light in and to make sure your photo isn’t overexposed.
4. Incorrect white balance
White balance is an essential setting in photography that determines how colors are rendered in your images based on the lighting conditions. When white balance is incorrect, your photos may have unnatural color casts, either too warm (yellow/orange) or too cool (blue), which can make your images look unrealistic or unappealing.
Common White Balance Mistakes
- Using Auto White Balance (AWB) in Complex Lighting
- Auto white balance is convenient but often struggles in mixed lighting conditions, such as a combination of natural and artificial light, leading to inaccurate color tones.
- Ignoring Lighting Conditions
- Not adjusting white balance for specific environments like tungsten lighting indoors or cloudy weather outdoors can result in unnatural color casts.
- Not Using Custom White Balance
- Failing to use custom white balance when shooting in challenging lighting scenarios (e.g., rooms with colored walls or unusual light sources) can make your colors look inconsistent.
How to fix incorrect white balance?
In-camera adjustments
1. Select the Right Preset
Cameras typically offer presets for different lighting conditions:
- Daylight: Ideal for outdoor sunlight.
- Cloudy: Adds warmth for overcast skies.
- Tungsten: Neutralizes the orange cast of indoor incandescent lights.
- Fluorescent: Corrects greenish tones from fluorescent bulbs.
- Flash: Balances colors when using a camera flash.
2. Use Custom White Balance
For precise control:
- Take a photo of a neutral gray or white card under the same lighting as your subject.
- Set this photo as your custom white balance reference in the camera settings.
3. Adjust Kelvin Values
Some cameras allow manual adjustment of color temperature in Kelvin:
- Lower values (e.g., 2500K) create cooler tones.
- Higher values (e.g., 7500K) produce warmer tones.


%20(1).png)
%20(1).png)


