The easiest way to fix white balance using Lightroom

There’s nothing more frustrating than importing your favourite shot into Adobe Lightroom, only to see the colours looking dull, strange or nothing like you remember from real life. If your images seem too blue, yellow or just “off,” don’t worry! Achieving the perfect white balance is easier than you think and you can do it with just one click.
Colours, Temperatures and Tints
These three elements make up what’s called “White Balance.” Getting them right is key to making your photos look natural and true to life.
Three ways to adjust white balance
There are several ways to fix white balance in Lightroom:
- Use the Eyedropper Tool for a quick, automatic adjustment.
- Select a White Balance Preset (like Daylight, Cloudy, or Tungsten).
- Manually tweak the Temperature and Tint sliders for custom control.
But if you want the fastest and most foolproof method, the Eyedropper Tool is your best friend.
Where Is the Eyedropper Tool?
After importing your image into Lightroom, head to the Basic panel. Look for the White Balance section and select the eyedropper icon. You can also just press ‘W’ on your keyboard to activate it instantly.
How to Use the Eyedropper Tool
- Move the eyedropper over your image and find an area that should be neutral-something white or grey.
- For portraits, the whites of the eyes or teeth work well. For other shots, try a white napkin, a grey shirt, or even cement.
- Click once, and Lightroom will automatically adjust the colors to achieve a perfect white balance.
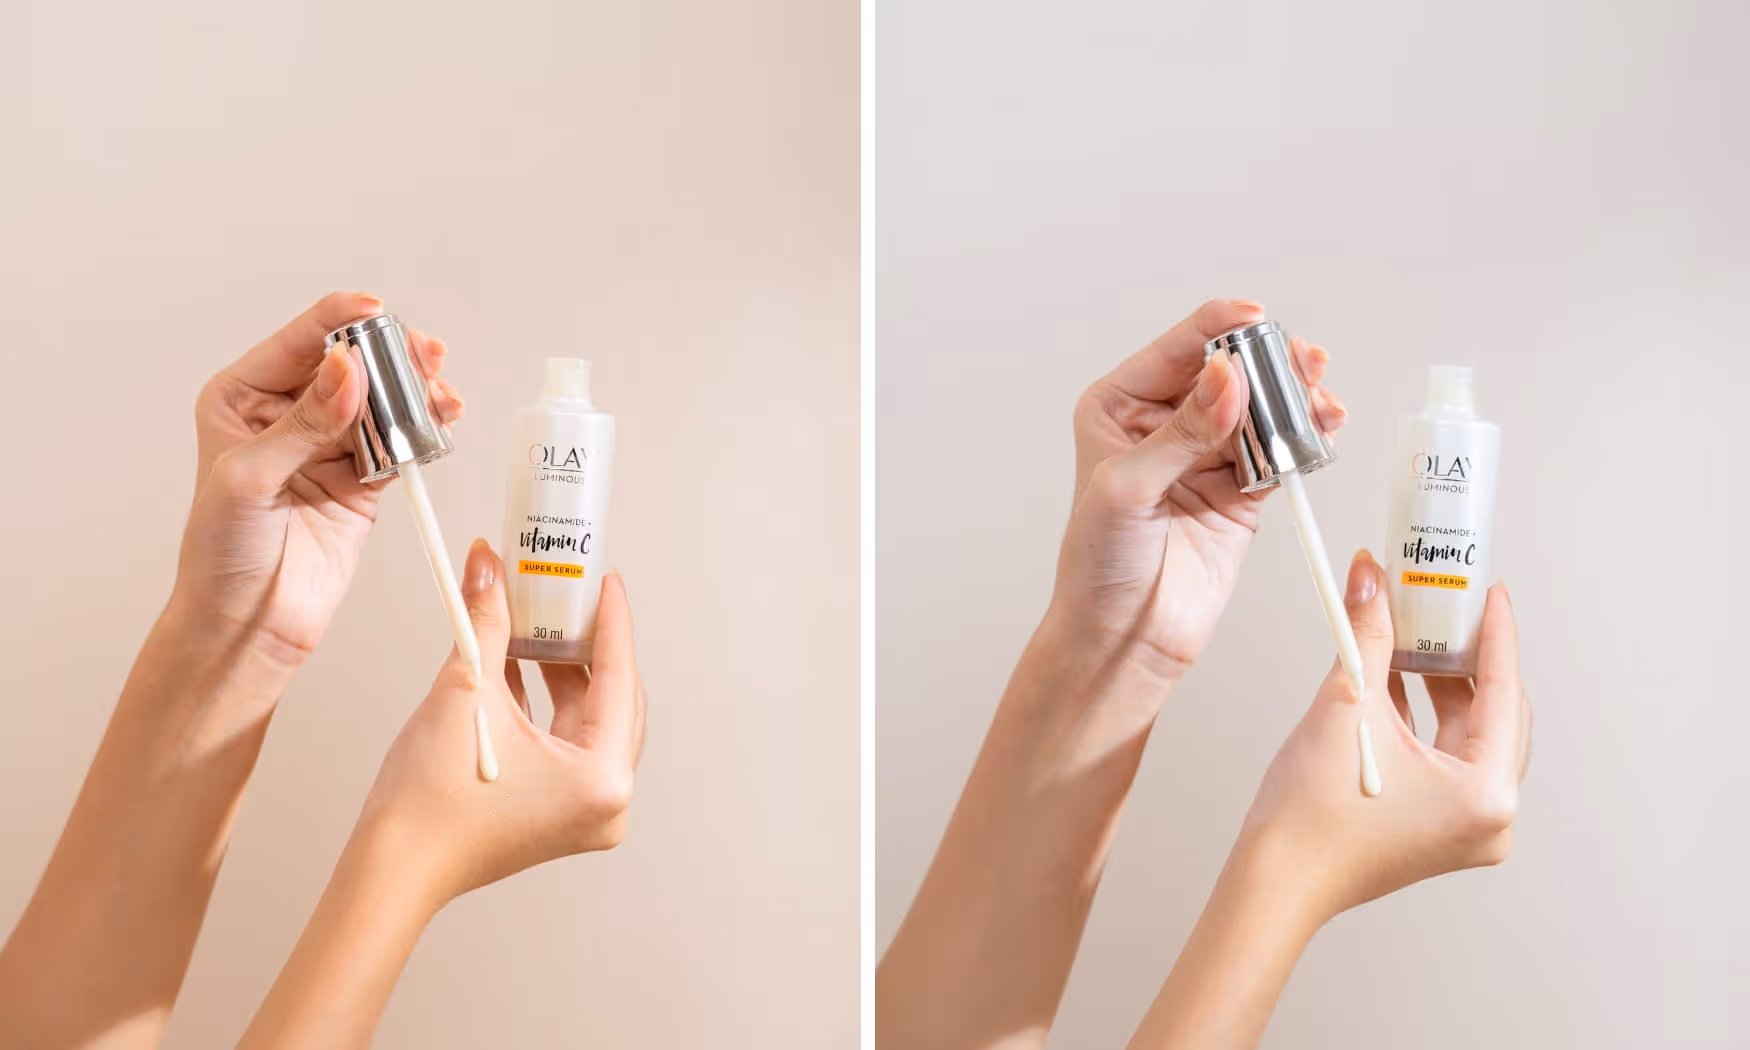
Before and After
.avif)
.avif)
A clean, crisp shot captured by the talented Anoora Pro team for our client Olay.
[#cta]
That’s It!
With just one click, your photo’s colours will look natural and balanced. Try it out on your next edit and see the difference for yourself!


%20(1).png)
%20(1).png)


