Everything you need to know about photographing products underwater

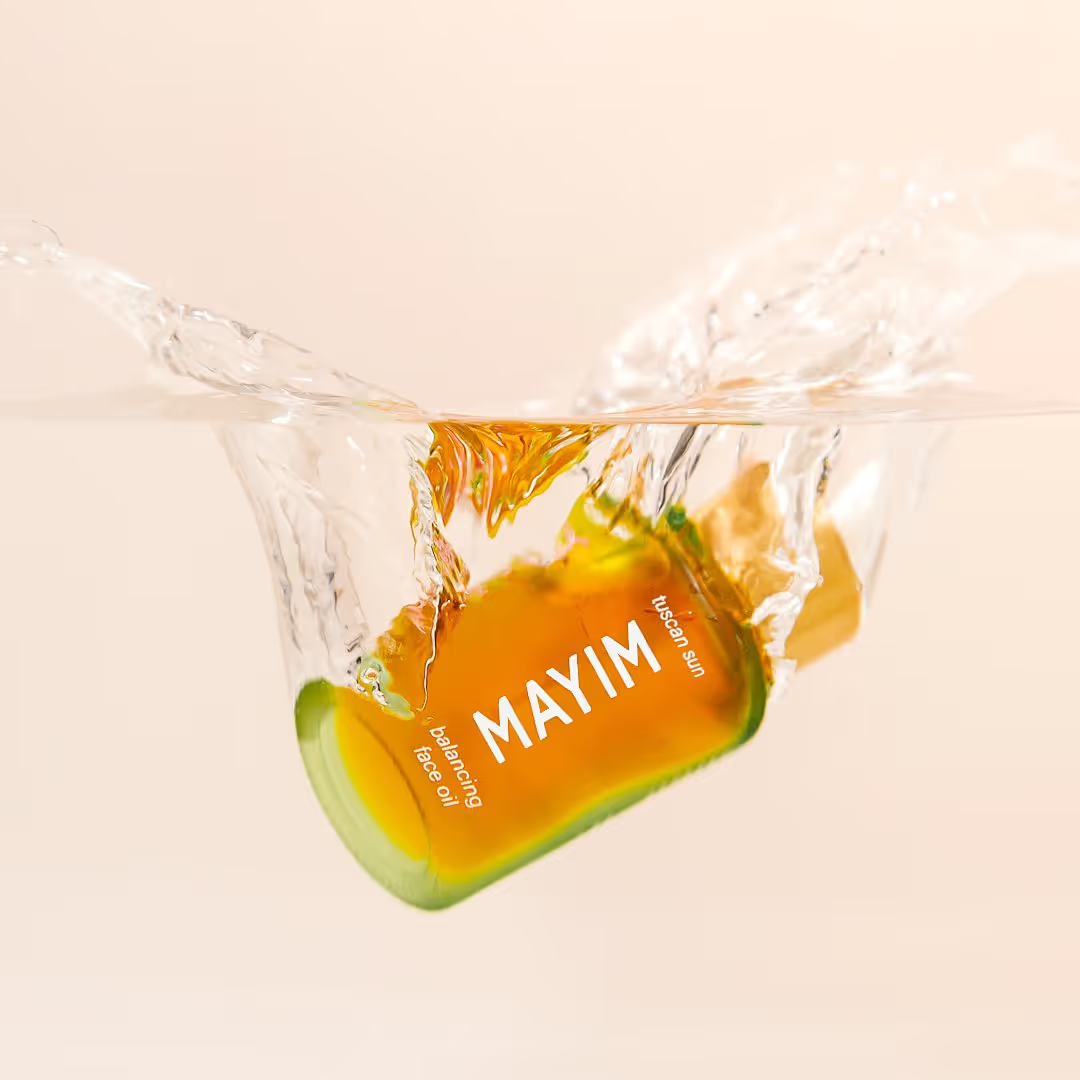
Have you ever seen those beautiful product photos where the item is suspended in water, mid-splash? They're stunning, and they're also bang-on trend. The water droplets and bubbles create a visually mesmerising textural element and creates a refreshing feel for consumer goods such as beauty and beverages.
Creating this underwater effect does require a bit of prior experience and equipment but it is still easy to achieve at home with some basic items and the right camera settings.
If you’d like to try this concept yourself we will run you through the optimal set up, technique and settings to ensure your next photoshoot makes a splash in all the right ways! Here's everything you need to know about photographing products underwater:


How to set up your underwater scene
Equipment you’ll need to get started:
- A transparent tank you can fill with water
- Coloured backdrop to place behind your tank
- Camera and tripod
- Artificial light source
Need a portable water tank? The two most accessible options that you should be able to purchase locally are a plastic shoe box or a small fish tank, as seen below.


Optimal lighting setup for underwater product photography
To capture the most detail when your product hits the water you’ll need to use super fast shutter speed. To accomodate this speed you’ll need to ensure your scene is well lit to let enough light into your camera.
- You can use continuous light for your setup. Place two softboxes on each side of your water tank and use white card or bounce boards to reflect the light and illuminate your setup more.
- Alternatively you can use a studio strobe with a high-speed sync if you prefer to shoot in burst mode. Make sure you place your key light in a position where it won’t create any reflections on the side of your tank.
Recommended camera settings
When photographing products underwater you want to use a greater depth of field to make sure your subject, including the splash and other details in the scene, is all in sharp focus.
Fast Shutter speed: At least 1/1000
Since you'll be capturing the subject in action (being dropped in water), you'd need to have a fast shutter speed to freeze that motion in frame.
Aperture: F/5.6 or higher
To make your subject (and other elements in the scene) more in focus, use a higher f-stop. The higher the f-stop, the greater depth of field.
ISO: 1600 or higher
With the camera letting less light coming into, you can pump up your ISO higher to make your photo brighter.
[#cta]
Tips while shooting
- Use high-speed continuous shooting (burst mode) to help you capture that perfectly timed shot
- In between clicks, air bubbles will form on the surface of the water tank. You can use a wiper to wipe it off
- Perseverance will pay off. Just keep shooting and shooting until you are happy with the results
- Working with electric-powered lights are dangerous when placed near water, be sure to have a safe setup
Post-production and composite tips
Adjusting and combining splashes
Want to add more dramatic splashes in your final image? You can source elements from different frames and composite them to your final piece using software like Photoshop.
Fixing labels
You can't totally control which direction your product will face or how it will align when being dropped in water. There are times you'll get the product label shown in the image but the shot isn't quite interesting, other times you'll get the perfect shot but the product label is facing in the back or it's showing only half of it!
When encountering such problem, you can do a little composite magic or fix it in Photoshop. Here are three simple techniques for fixing product labels in post-production.
Fun underwater executions and ideas
Make it more fun by cloning objects!
(video by Danni Rossi from @dannirossistudio)
Turn it upside down!
(video by Keegan Evans from @keeganevansphoto)
Squirting ink or pigment in the tank
(video by Mario Koll from @mkc.reative)
Play with bubbles!
(video by Evan Naka from @evan_naka)
Conclusion
Photographing products underwater is fun but can be technically challenging and time consuming. Many of our community members using this technique have mentioned it took them many attempts to get the perfect shot!
There are a lot of different elements to consider with underwater shots, such as motion and reflective surfaces from the water tank. This is why it’s important to understand and learn the correct techniques and settings before you start. With a little practice and patience you’ll be well on your way to achieving outstanding results!


%20(1).png)
%20(1).png)


