Step up your product photography game with these resourceful DIY risers
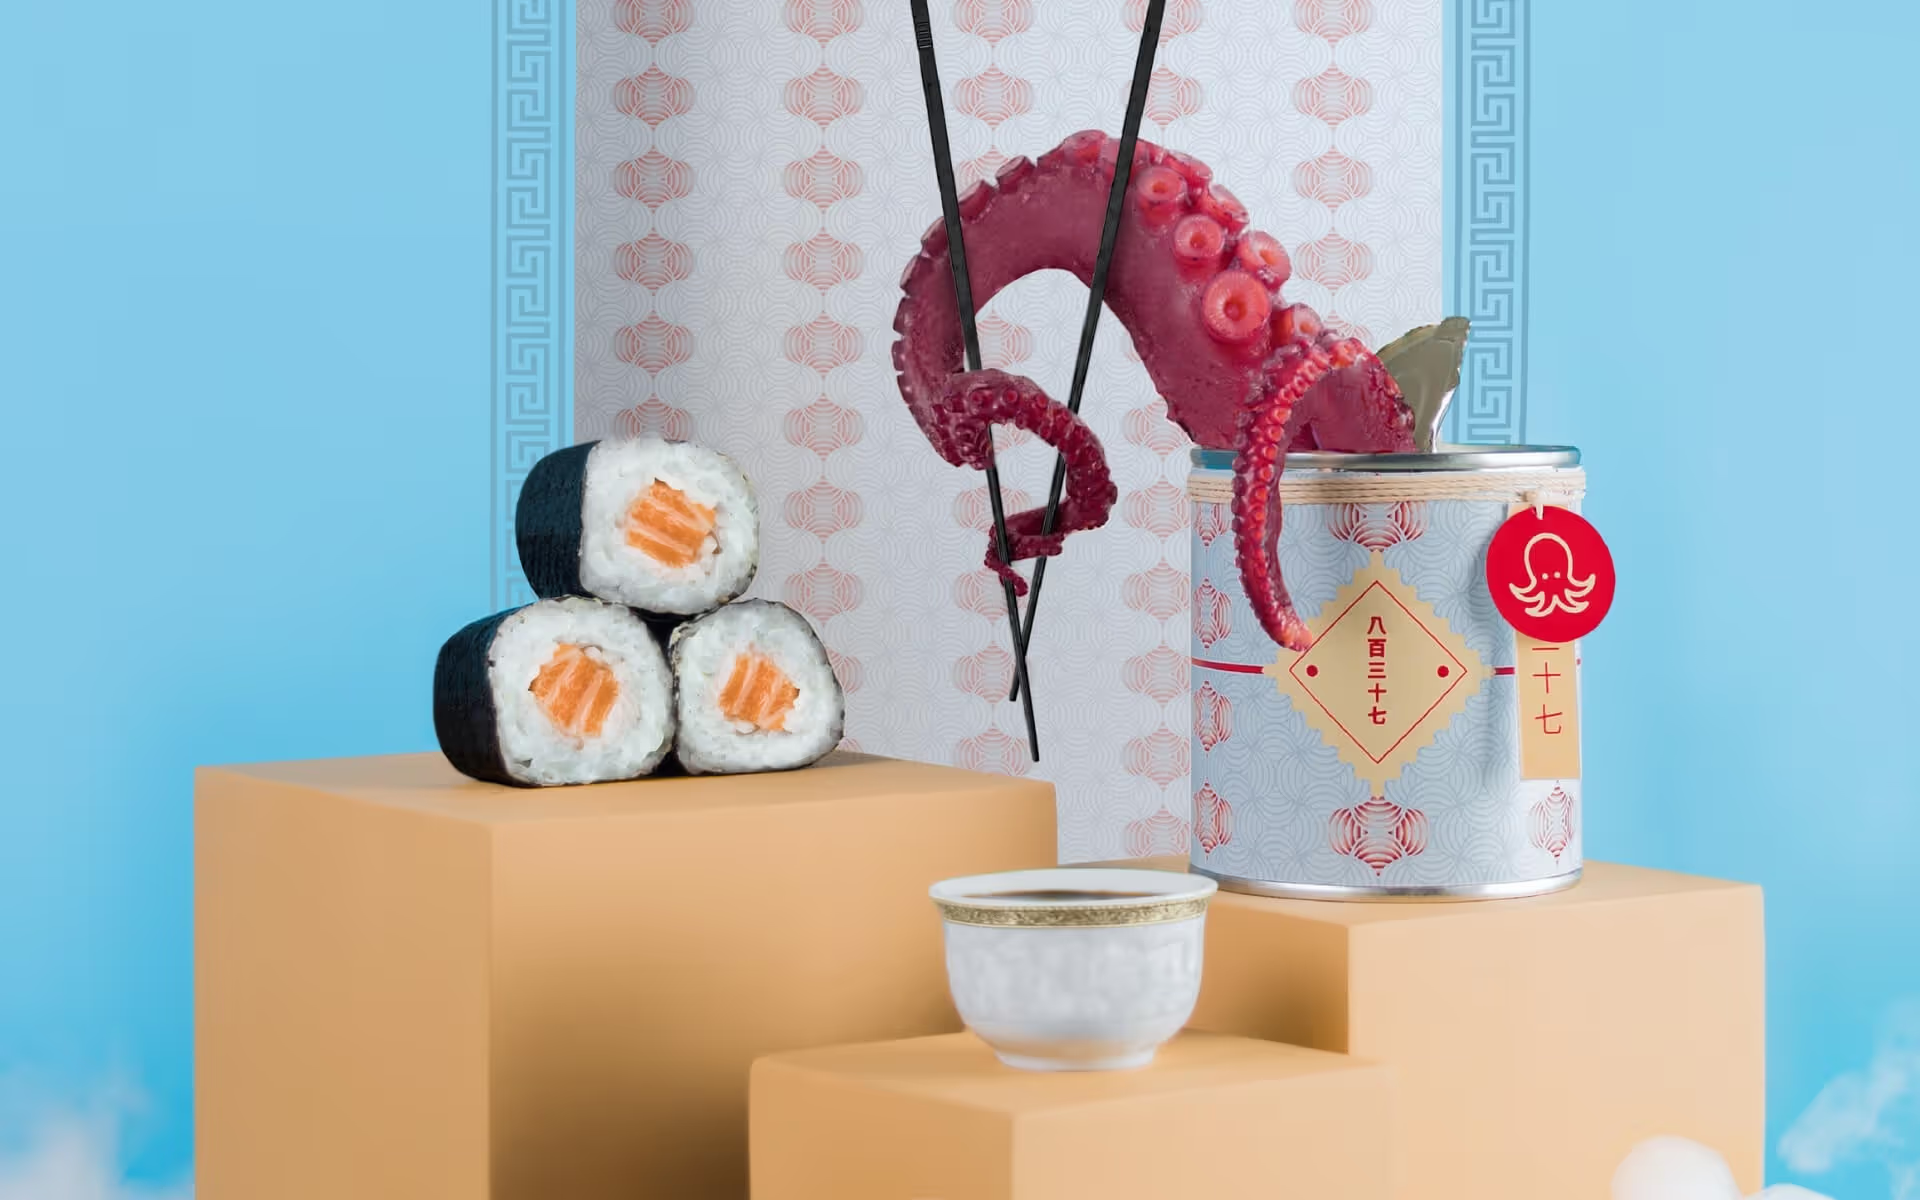
In ecommerce, styled product photography is one of the most sure-fire ways to capture the attention of potential customers. With a little resourcefulness it is simple to replicate a high-end editorial look using geometric boxes and risers.
Geometric platforms are a popular styling trend and we've seen a lot of them in brand photography, from jewellery to beauty and skincare products. Risers are particularly useful in displaying items in a neat and minimalist fashion without distracting from the main product for sale.
If you're exploring more ways to stylise your product photography setup, we've got some great workflow tips from Spanish photographer Julian Eloy Fernandez perfect for all budgets!
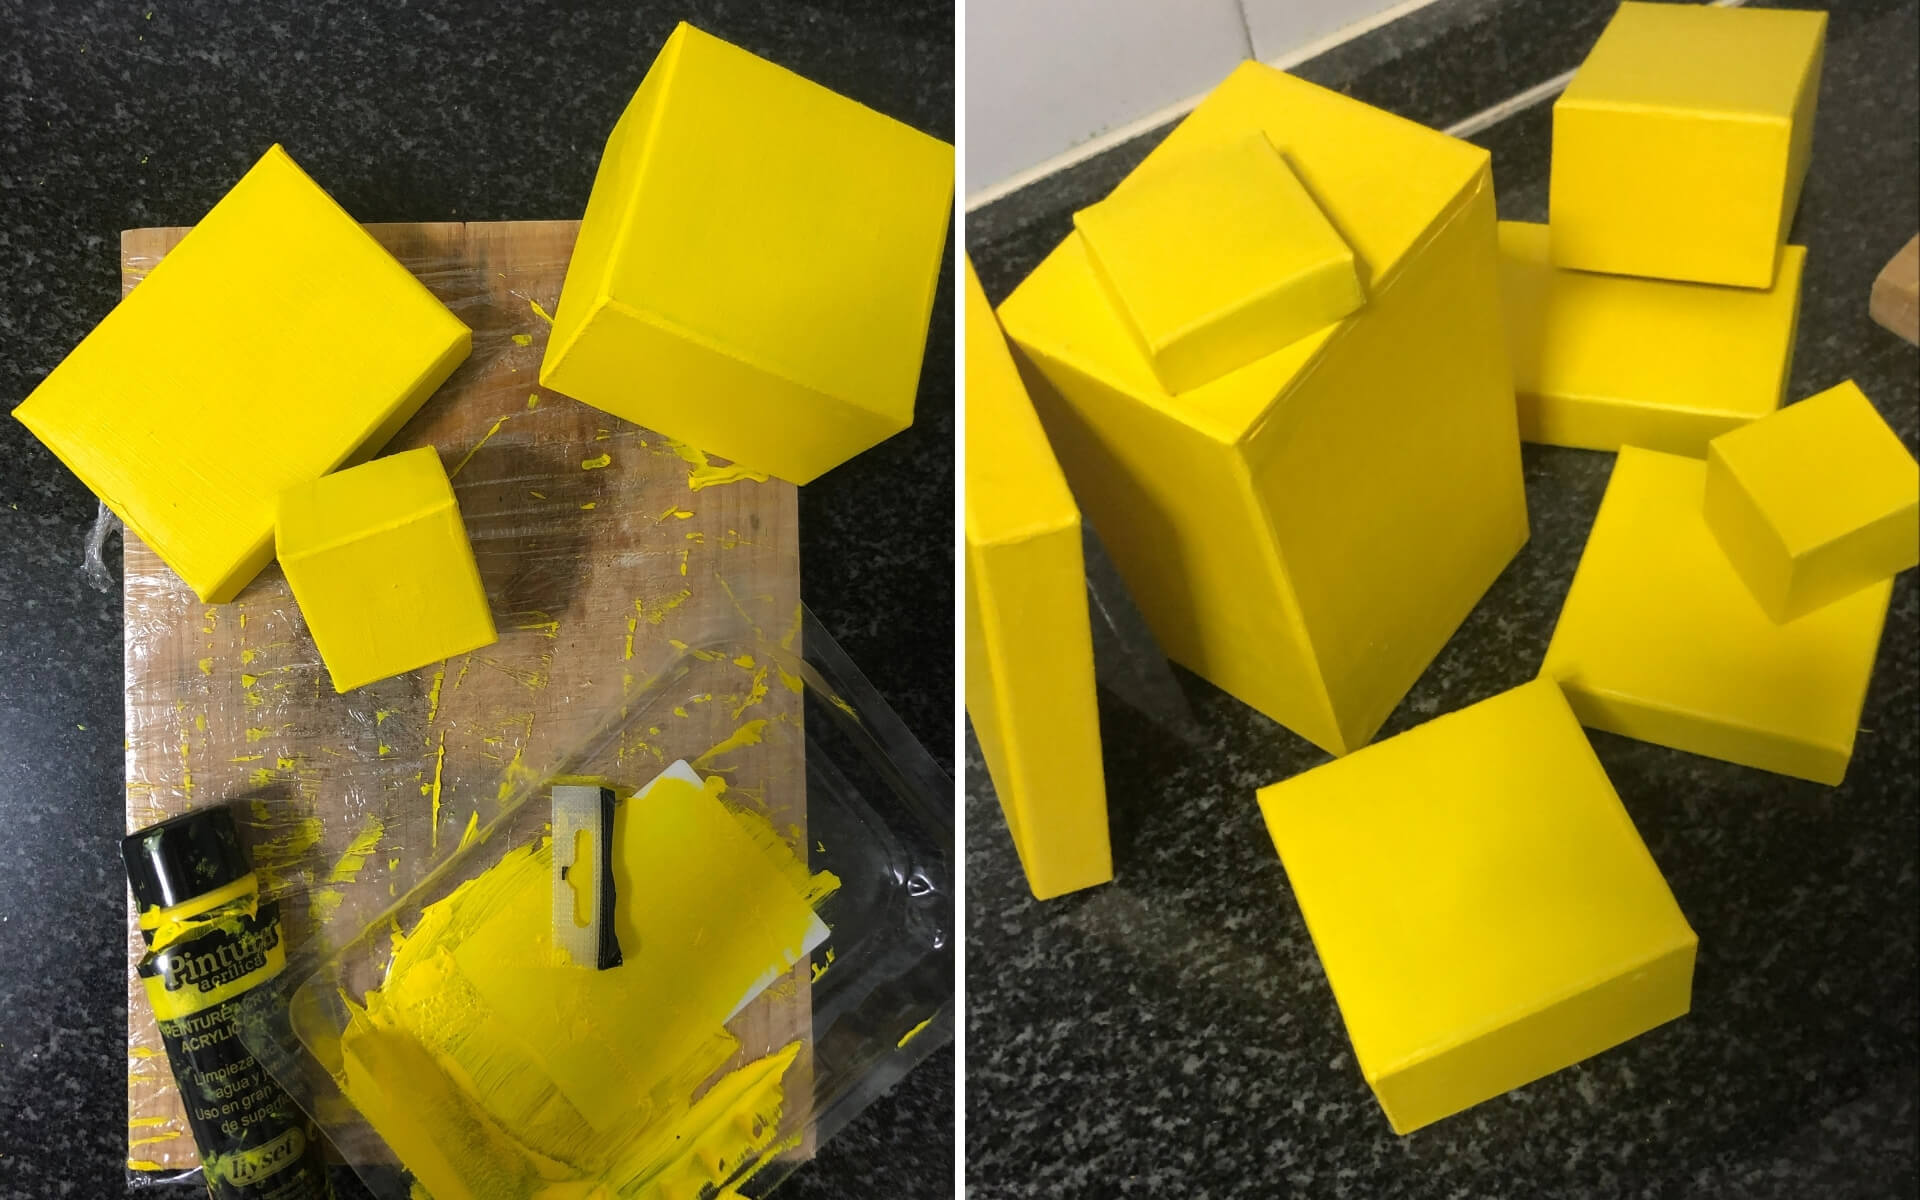
1. Prepare the props
Don't have any specialised photo risers to use as props? No need - you can simply use an assortment of affordable gift boxes to serve as your risers. Then, you can paint them to achieve the perfect colour you desire. The tip here is: be creative and resourceful!
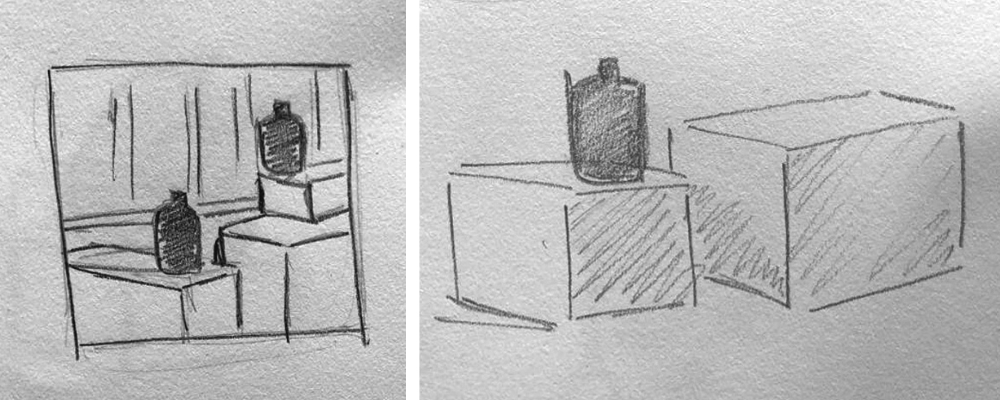
2. Compose your subject through sketches
Sketch up some ideas for how you'd like to compose your subject. This allows you to have a preview of how the products and risers would look like in your shot and will save time on set.
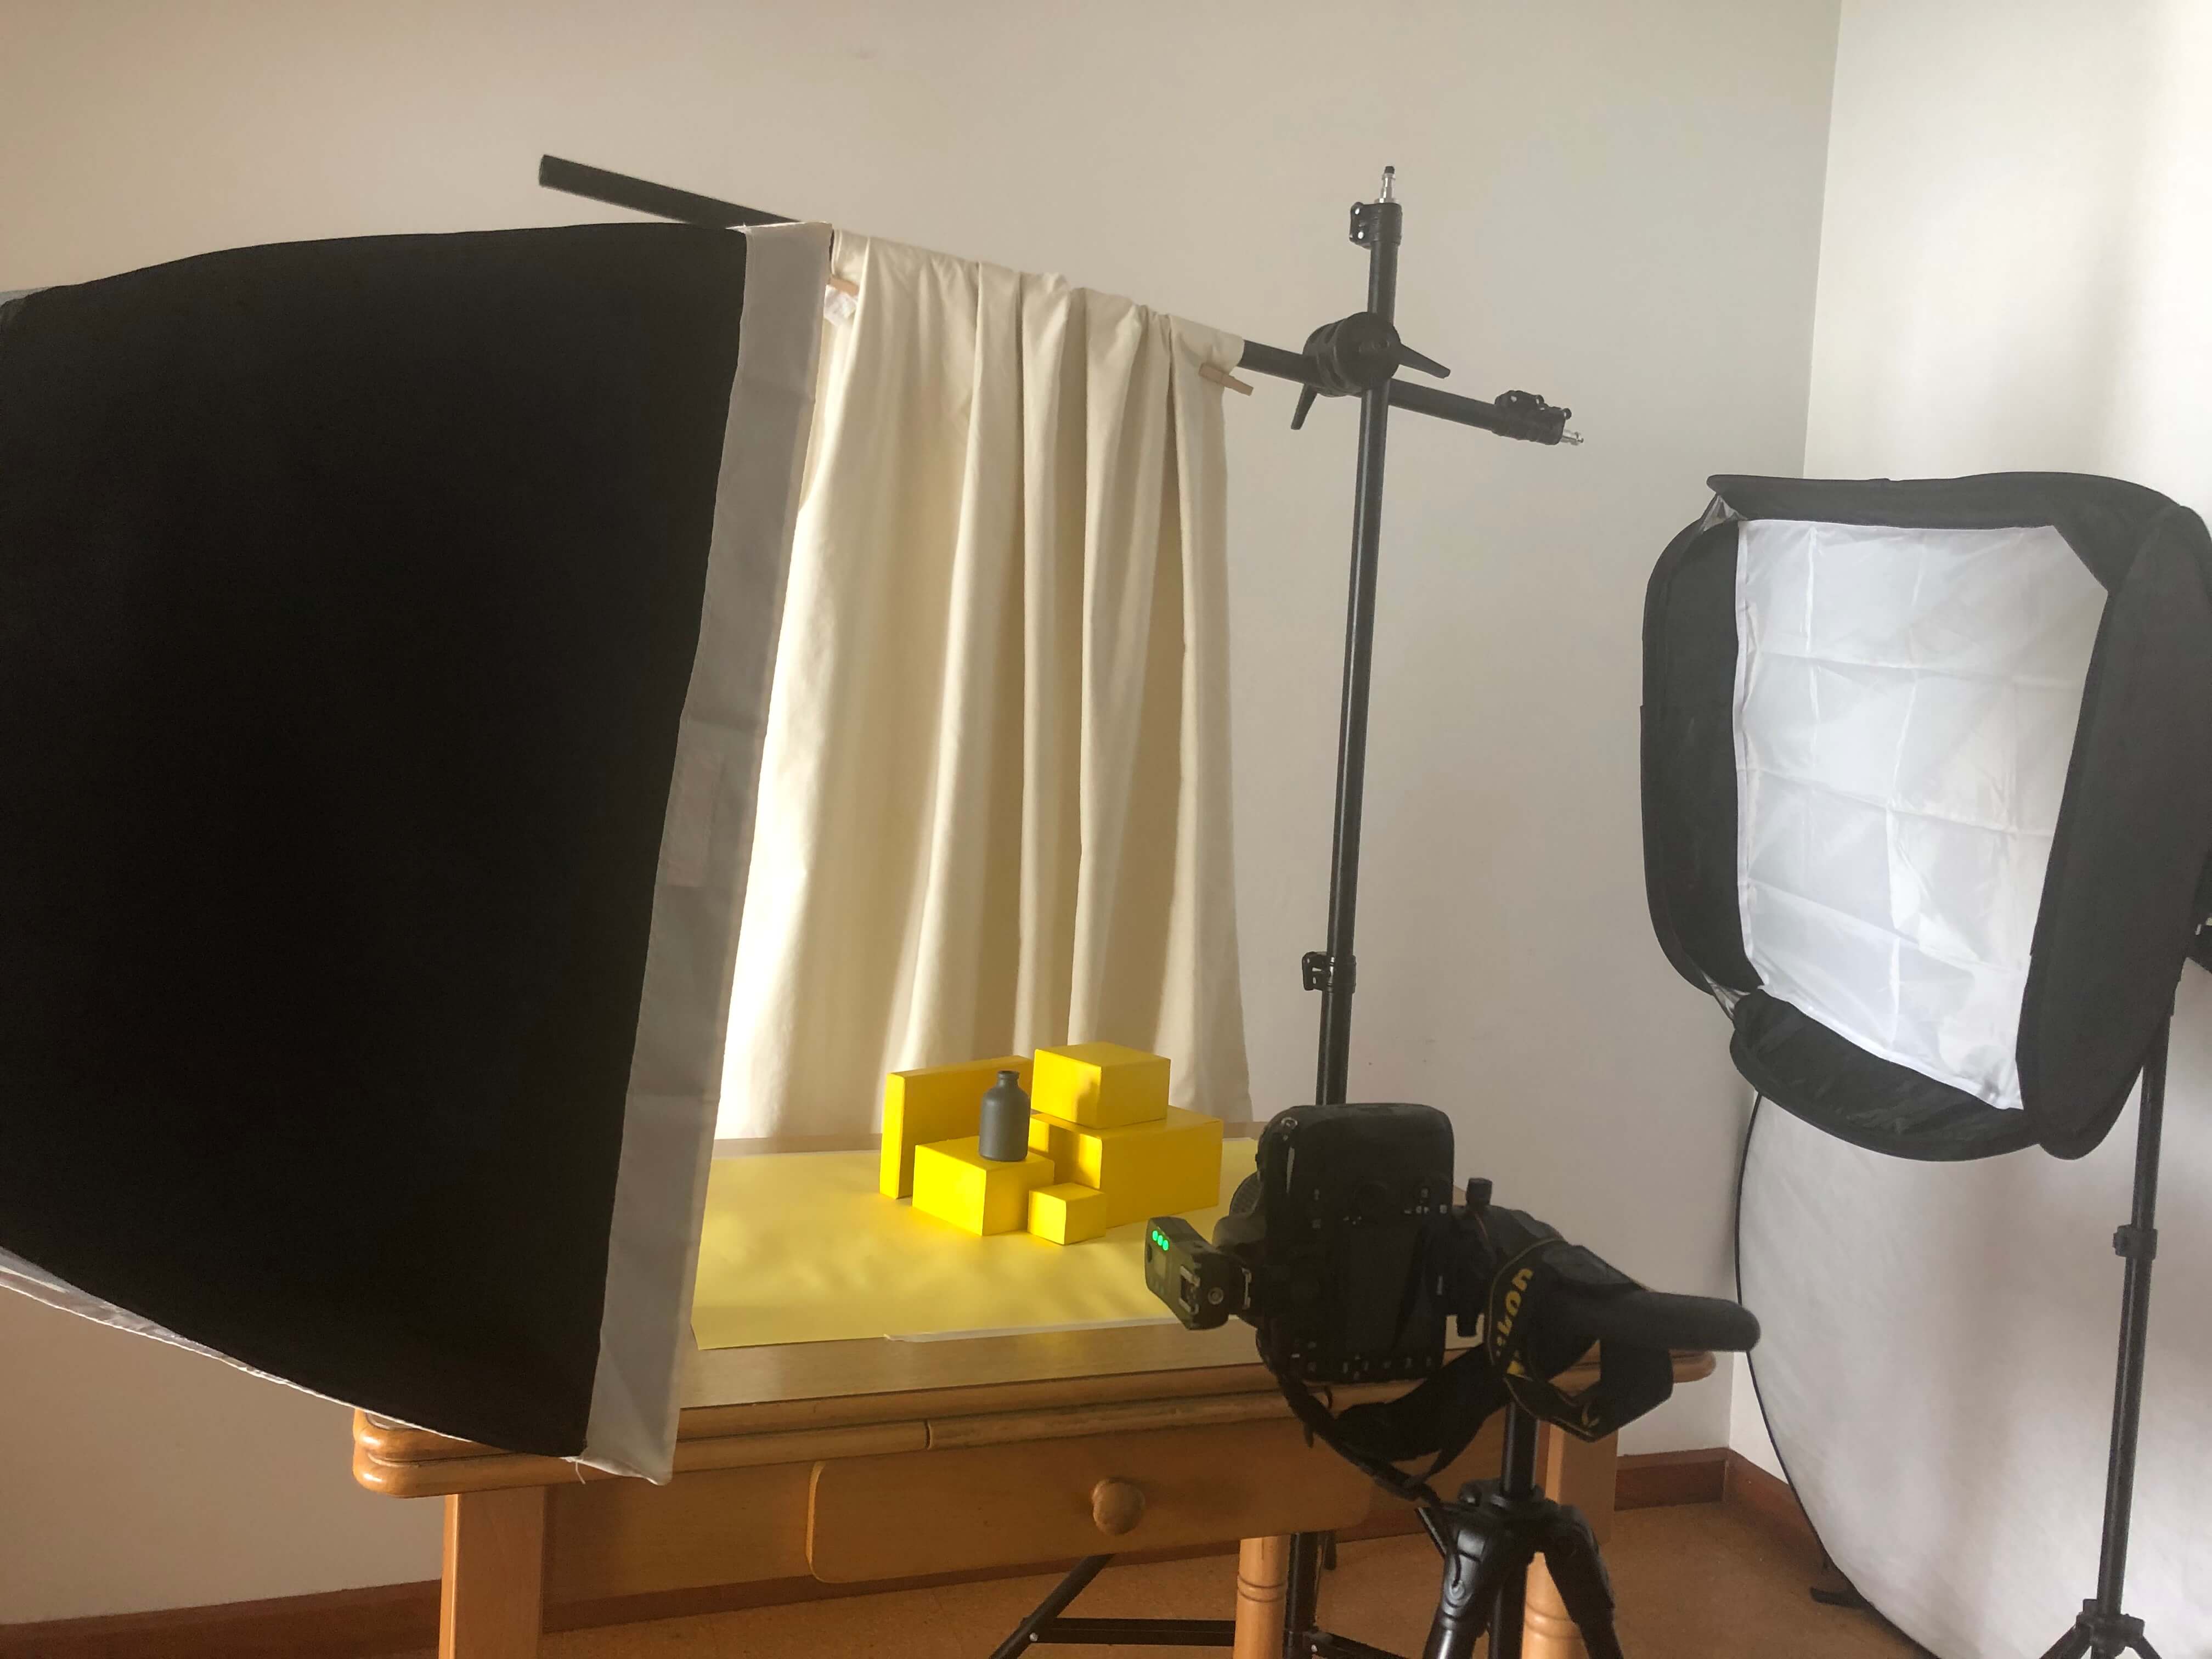
3. Set up your scene
Start setting up your scene—you can add a little style to your set up by using a curtain or draped fabric for your background. Set up lights to ensure your subject is properly exposed. Maintaining consistent lighting is particularly important if you want to clone or manipulate your subject in post-processing.
[#cta]
4. Get creative and experiment with the set up
To maximise the creativity of your set up, you can take multiple shots and experiment with placing your subject matter in different positions and areas of your scene. This creative tip is especially useful for occasions where you only have one item available to photograph. Capturing your subject in different areas of your scene will enable you to create a composite featuring multiple items in your final image.

5. Work some Photoshop magic!
Get into Photoshop and explore the different compositions you could create with your photos. You can select your favourite positions and blend your shots into one final image by using layer masking for greater editing flexibility.
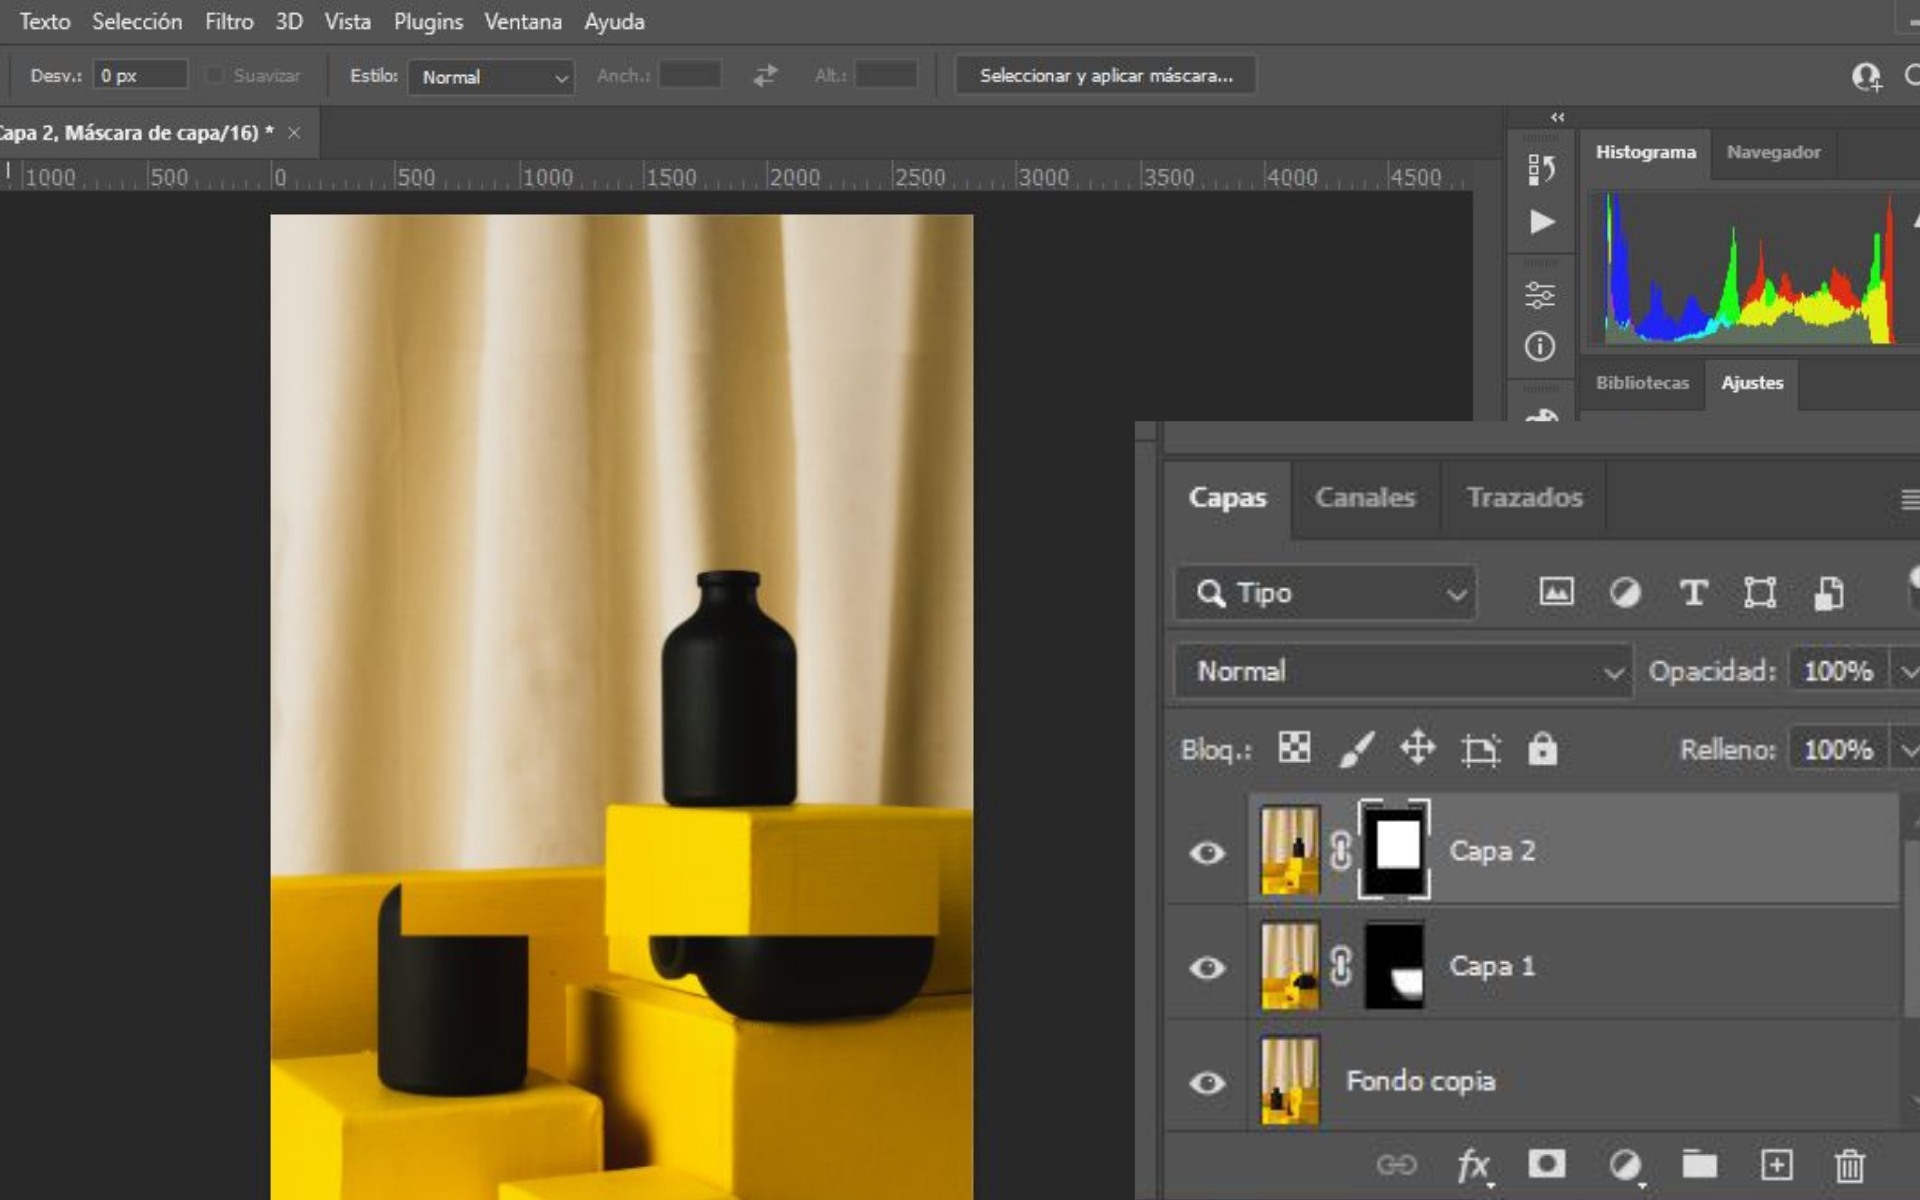
To create your composite image simply open your base image and load the alternate positioned products as a layer on top. Add a layer mask to each of the layers by navigating to Layer> Layer Mask> Reveal All.
Next you can remove any unwanted areas of the overlaid image by selecting the Brush tool and painting in black the parts you want to make invisible. Continue using the Brush tool until you're satisfied with the results and you can repeat the process with the other layers.
Check out these results!
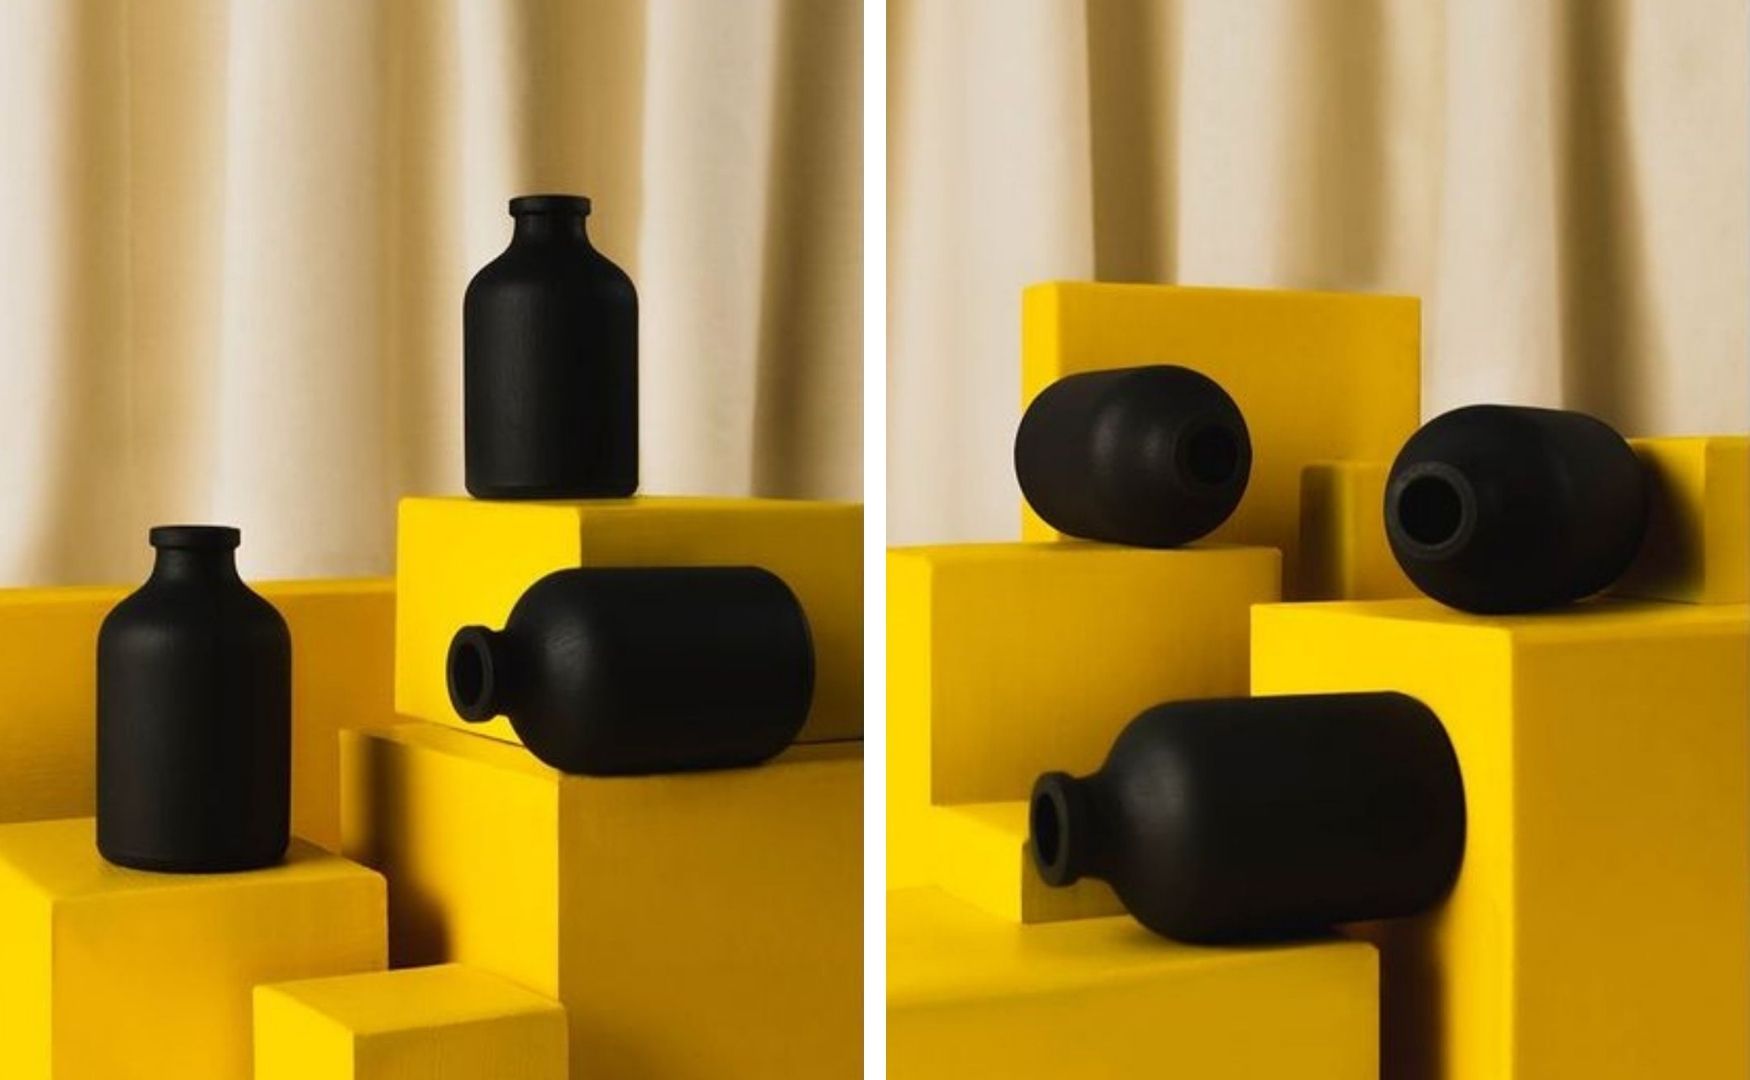
With just one product and some cheap cardboard boxes you can create a high end, premium looking scene. Thanks to Julian for sharing his workflow with us! To see more of his creativity you can visit him on Instagram at @soy.mishi


%20(1).png)
%20(1).png)


