Step by step guide to brightening photos with Lightroom for mobile

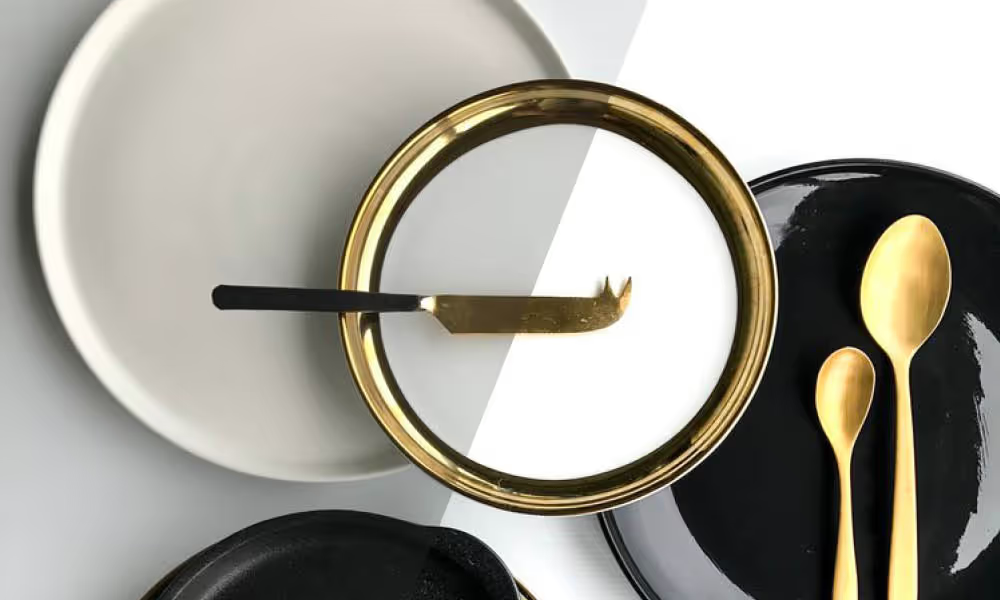


Styling and photographing compositions with white items and backgrounds can be exceptionally challenging to edit. Whites can sometimes appear yellowed or grey and not achieve the desired outcome of a bright and crisp tone. A common editing mistake is to increase the brightness of the image to take any grey areas to white but this usually results in a loss of detail or washed out image.
This tutorial will demonstrate the simplest and most effective way to edit the overall brightness and tones and will take the background of our photo from grey to white. We recommend opening this post up on your desktop computer, downloading the Lightroom for mobile app, and following along the tutorial on your phone as we go. If you want to save or screen snap the image below you can join us step by step as we work through this quick and easy smartphone edit.
Update: After publishing this tutorial we have discovered that Step 2: Selective Adjustments is not part of the free version of the app but is still able to be used with no charge for a one month trial.

Our aim in editing this image is to:
- Even out the lighting by reducing the darkness through the left side and achieve a balanced white background that almost disappears, allowing our objects to be the focus
- Highlight the texture on the speckled plate and the shine of the larger black plate
- Enhance the gold features
- Reduce any fuzz (noise) to create a smoother and clearer image
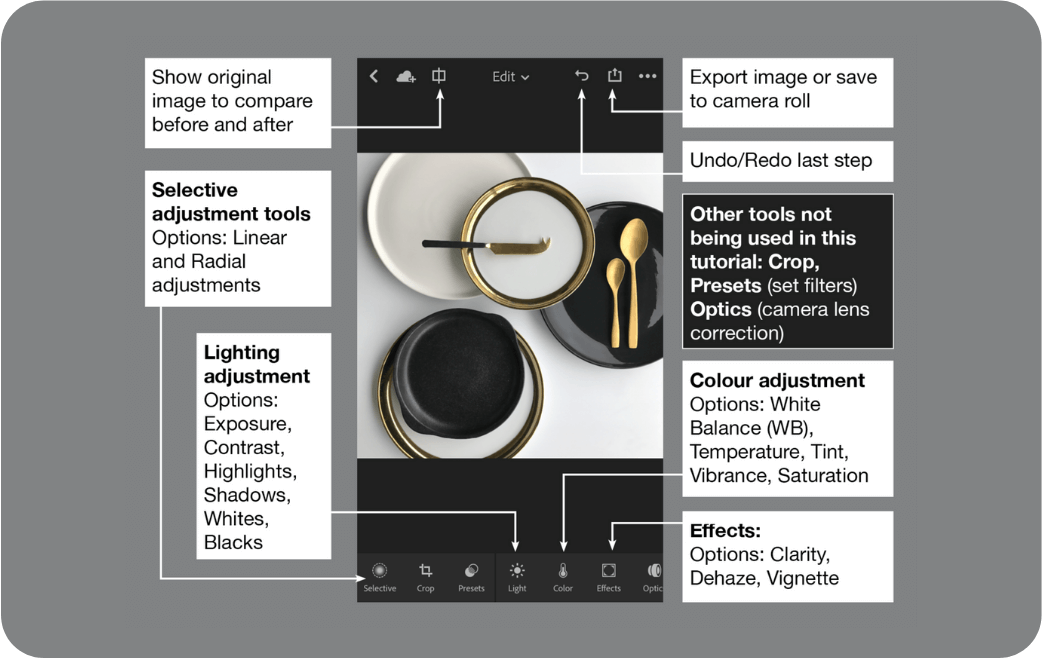
Introduction to Lightroom for mobile
Before we start editing our photo let's familiarise ourselves with where all the tools are that we will be accessing in this tutorial.
- Each type of adjustment is grouped and found at the menu at bottom of the screen.
- The options listed within each group on the menu are presented with a simple slider which can be swiped with your finger to increase or decrease the effect to the desired level.
- Each step can be reset or undone by hitting the return arrow at the top of the screen.
Introduction to the tools and menus we will be using in this tutorial
Step 1: Adjust the white balance
Select the Colour menu to be able to adjust the White Balance (or WB) which will correct the temperature of your lighting.
Why is this important? Different lighting scenarios can often make your images appear more cool or warm hued depending on where you took the photo, and if you were in artificial or natural light.
How to make the adjustment: You can adjust this manually by eye, by selecting Auto (from the drop down arrow next to Custom) or using the eyedropper tool to select the area of your image that you want to look white. You can see here in the image below that by using the eyedropper on the white background (visible where you can see the crosshairs) it automatically adjusted both the Temperature and Tint of this photo.
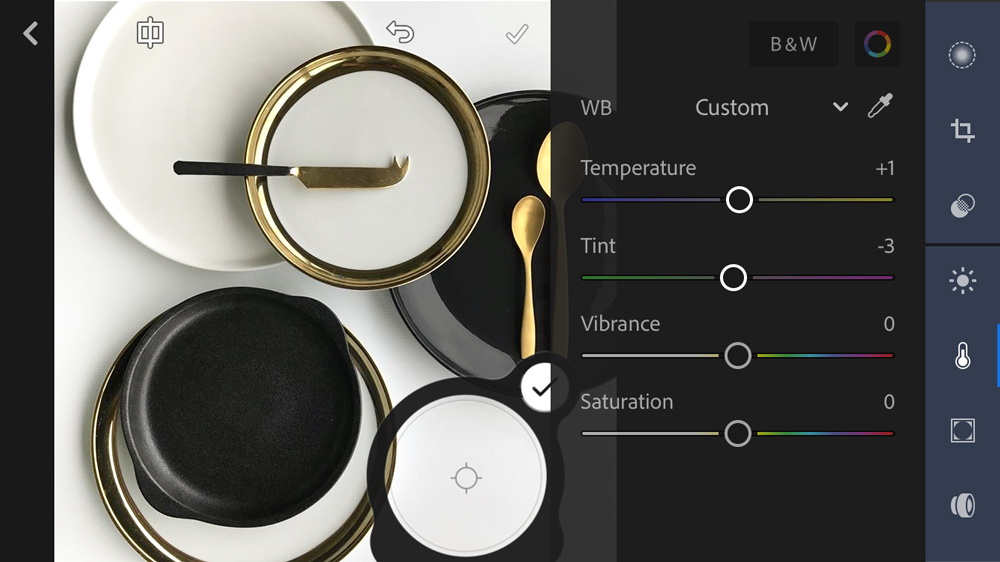
Custom white balance edit from using the 'eyedropper' tool shown with the crosshairs on the image
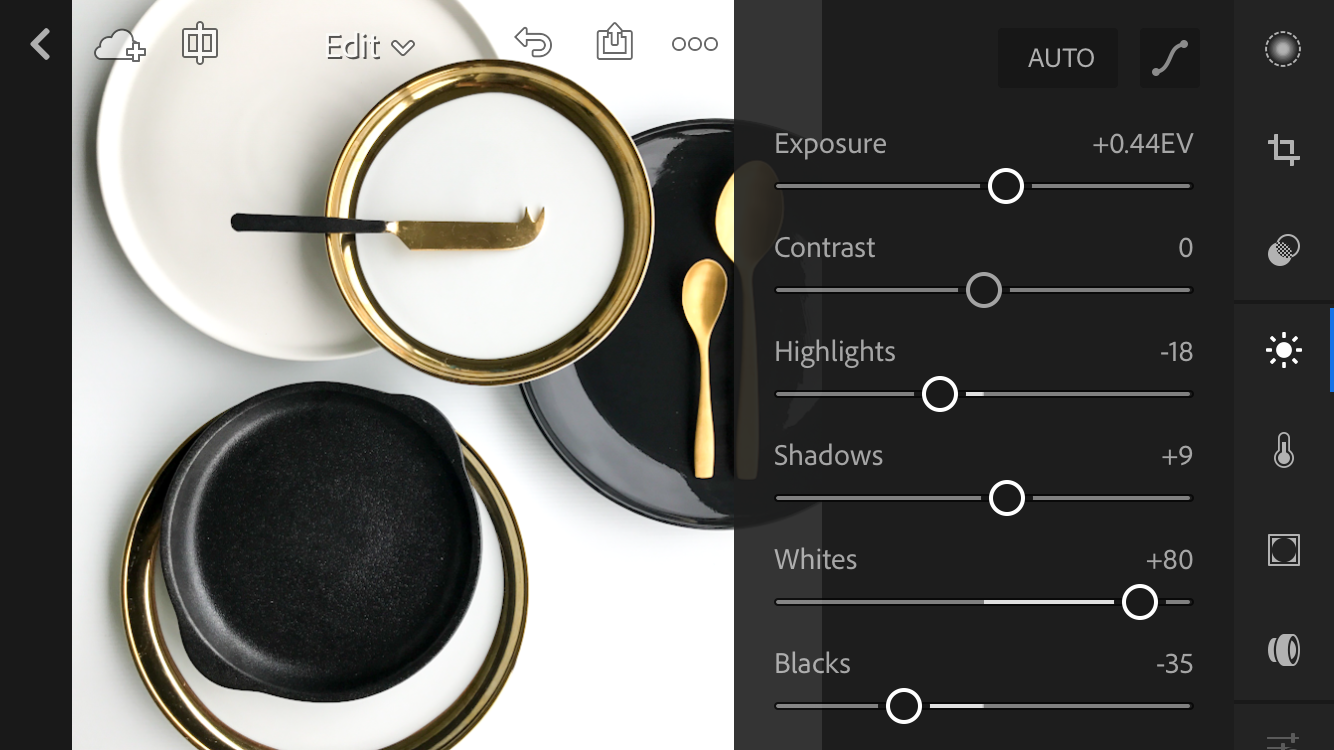
Step 2: Edit the lighting
Select the Light menu to be able to adjust the overall tone of your image.
By adjusting the lighting in our image we will be able to brighten up those white tones. We first selected the AUTO option in the image below to see what it would choose for our image. Unfortunately it overexposed the image and lowered the contrast meaning that the black tones were washed out along with our colour. You can see below that the photo has lost a lot of its depth in tone and detail.
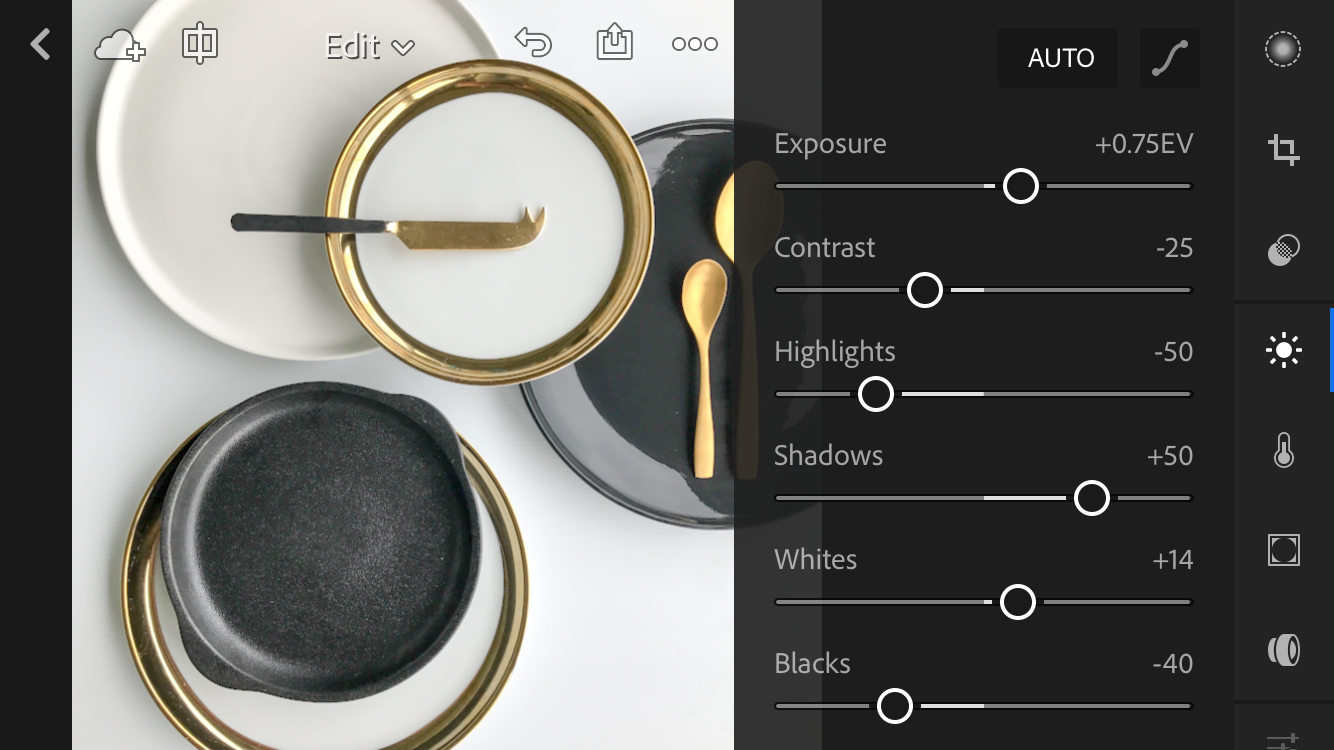
We hit the little Undo curved arrow at the top to reset and tried the adjustments again manually. This time we only bumped up the exposure a little and then concentrated on the other adjustments.
Light tones: By bringing the Whites right up and the Highlights down a little we were able to keep the background looking very crisp and white without losing the definition of the big white plate.
Dark tones: We used the same approach with the blacks, a little increase in the Shadows brought out some of the detail in the black speckled plate but by dropping the Blacks down we kept the dark colours nice and deep.
[#cta]
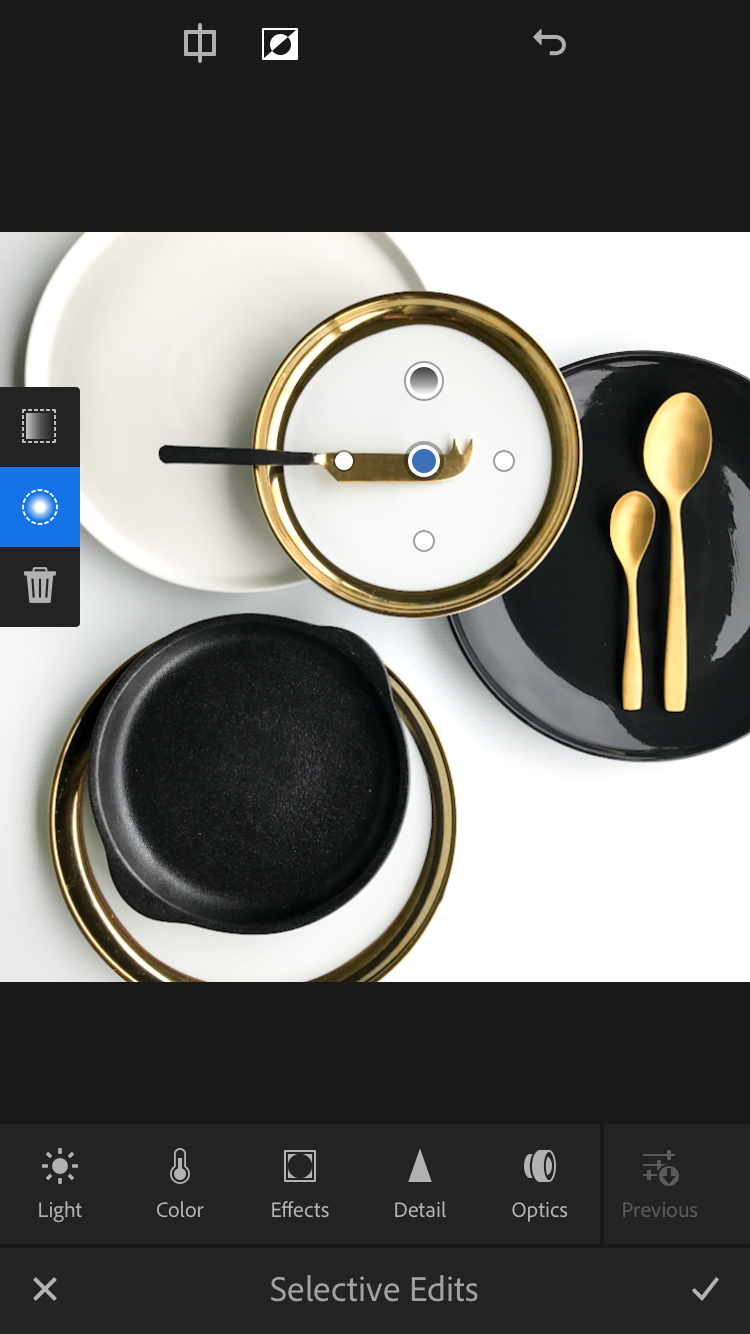
Step 3: Selective Adjustments
This is where it all gets a little bit more technical, although once you get the hang of it you will wonder how you ever lived without it! The selective adjustment tools allow you to apply adjustment filters (like we just did in Step 2) to just a portion of the image. We selected the radial adjustment first so that we could try and brighten up the white of the middle plate.
Radial selective adjustment:
- Select the circle shaped option from the side menu (seen below in blue)
- Touch it onto the area you wish to edit and you will see different adjustment points.
- Using your finger to swipe the blue circle will move the centre of the adjustment to precisely where you want it to be.
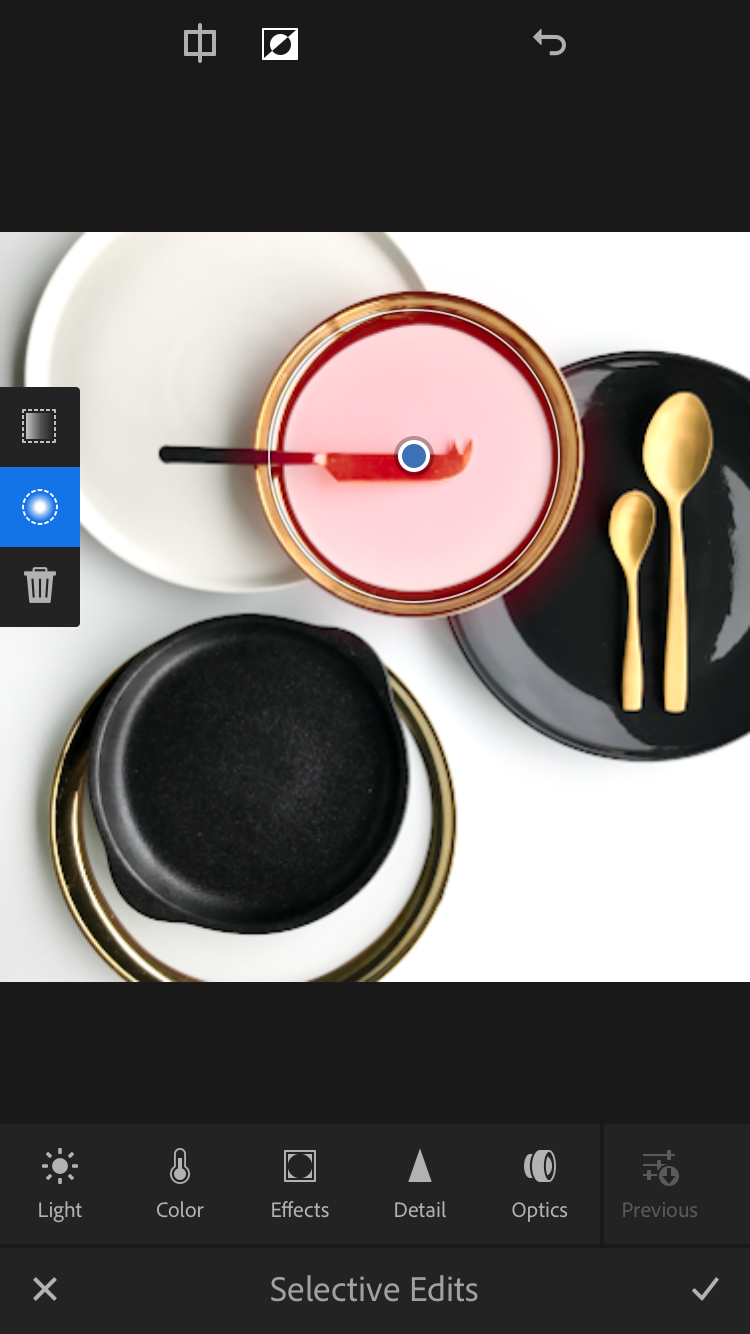
- Dragging each of the white circles outwards will increase the radius of the circle. It will appear in red as you enlarge it so you can see which areas of the image you will be editing.
- Adjusting the black and white circle at the top will soften the edges of the circle so you can choose how gradually you would like to apply the effect.
Once you have selected the specific area you would like to adjust you can select your chosen effects from the menu at the bottom of the screen. We chose just to adjust the Light and increase the White values for this selection meaning that only the light tones of the plate were affected and therefore not compromising the colour of the knife in the middle.
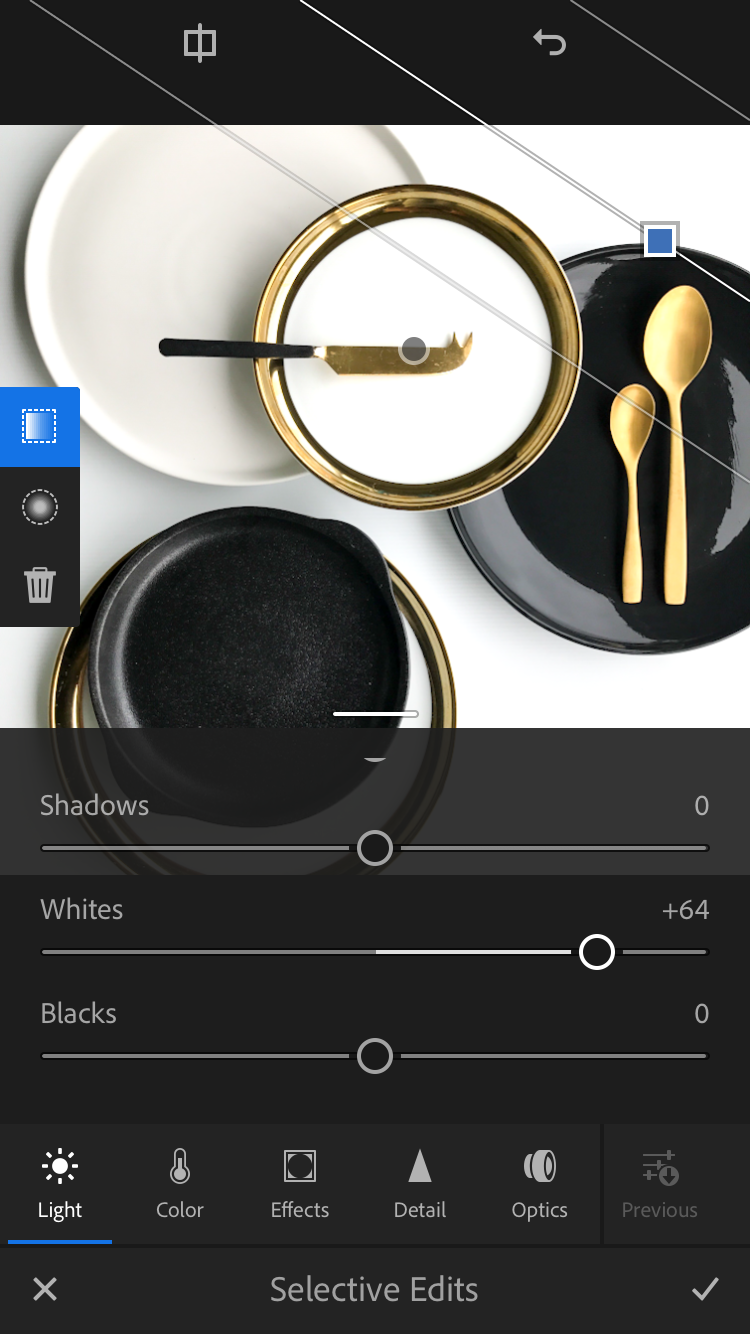
Linear selective adjustment: The linear graduated filter works in a similar way but is a gradient or wash that you can drag over the image. Once again the square symbolises the centre of the effect and the two lines on either side can be dragged forward or backwards depending on how gradually you would like the effect to fade off. We are going to apply this effect to the corners to see if we can get those white background tones really bright! You will see that the centre points of the previous selective adjustment points remain on the image which means you can click on them again to apply further tweaks or remove altogether.
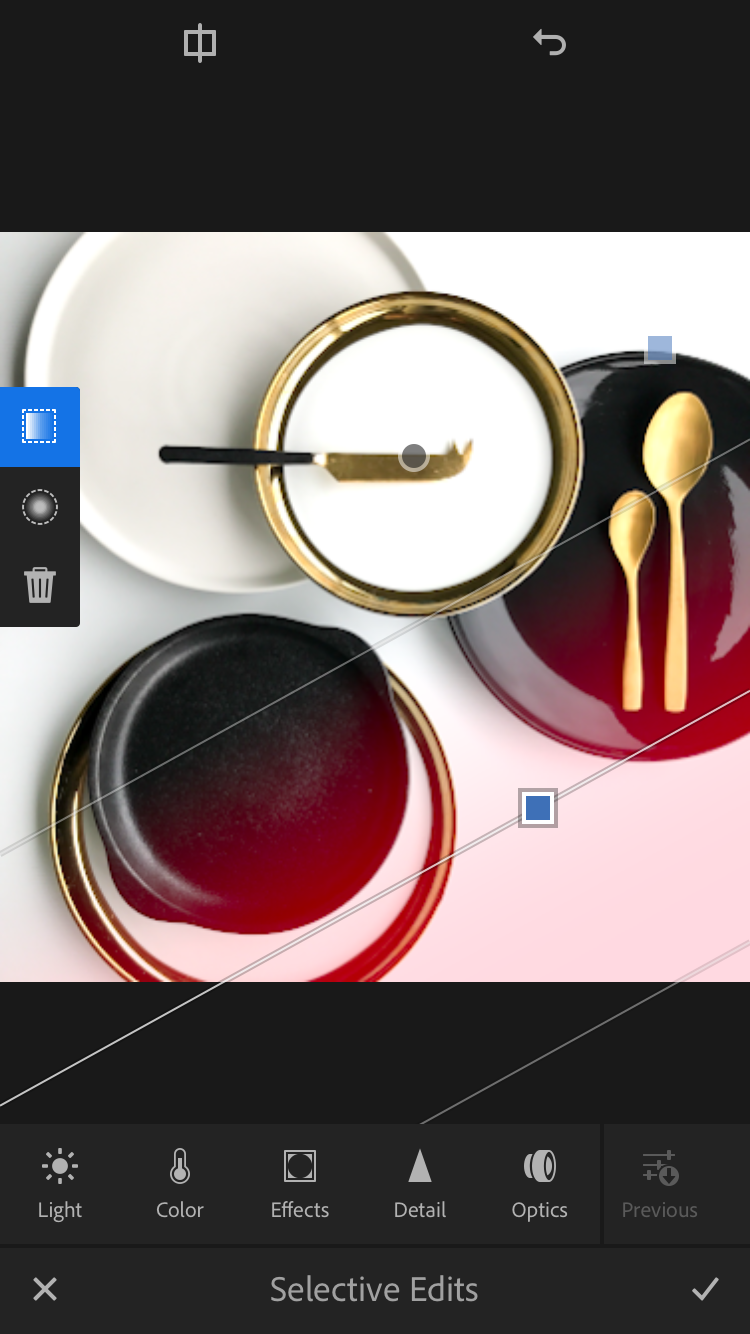
After brightening up the edges with the linear graduated filter we applied two more radial filters onto the bottom white plate to try and reduce some of the yellow tones. By using two circles we were able to overlay the effect at the top and side of the plate meaning that we didn't overlap with the gold edges on the plate above. Instead of using lighting affects we selected Colour from the lower menu and reduced the Saturation until all of the colour was removed.
Final adjustments: Next we selected Effects and gave the Clarity a little boost to sharpen it up and we were all done!

Final notes
Editing photos is a matter of personal taste and along with anything creative is completely subjective. This photo was edited in the spirit of trying to achieve a perfect white background while preserving the other colours and dark tones in the image. There is a chance that you preferred the moodier vibe of the original image which is completely fine! We hope that you still enjoyed our tutorial and recommend Lightroom for iPhone as a quick, easy (and free!) way to perform high quality edits right on your phone.
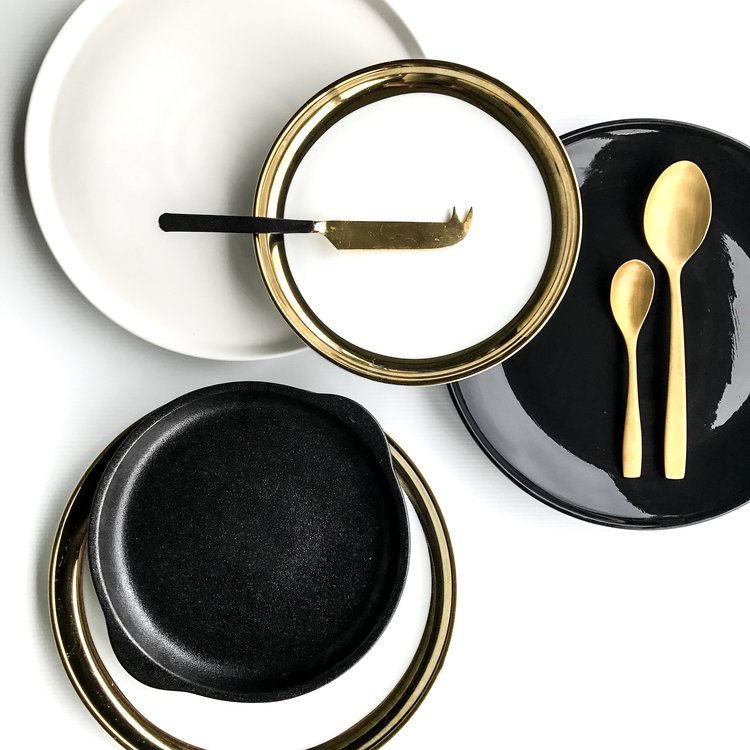
Before and after comparison


%20(1).png)
%20(1).png)


