Put your creativity inside the box with this fun Instagram photo trend


You might have seen the ‘in the box’ movement on Instagram recently. It's almost reminiscent of the Brady Bunch opening credits, but with boxes! One of my favourite ‘in the box’ images on the gram at the moment is by Claire Barrowman from @clairefluttersby. I asked Claire how she cleverly put her ‘in the box’ images together and created her ‘in the box’ work of art. Here is Claire’s step by step guide to help you create your own.
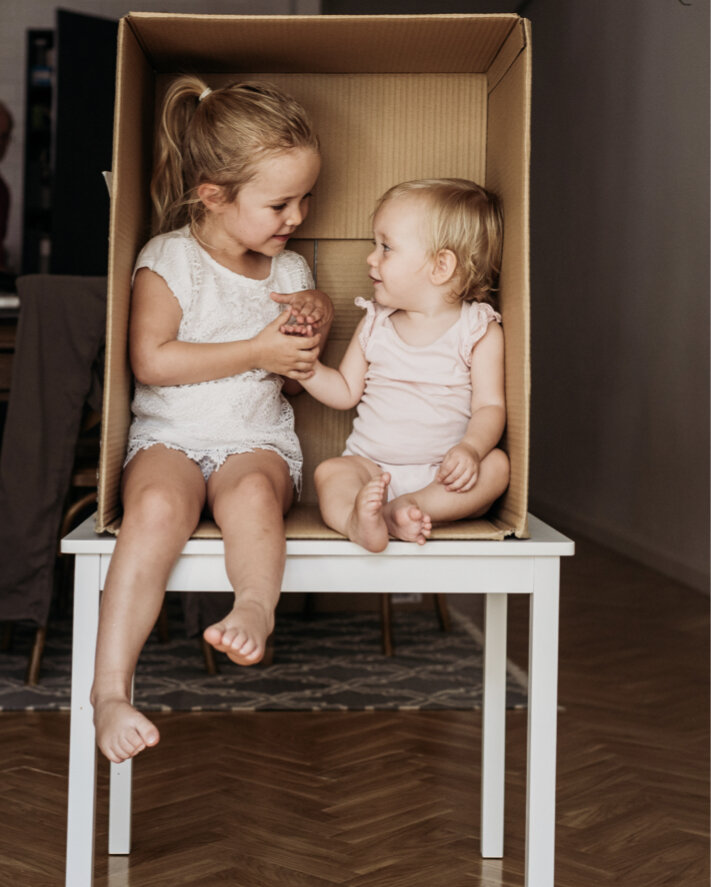
The first step is finding a suitable box
For this I’d recommend one that’s big enough for your subjects but not so big that your subjects get lost within it. It would also be good if it were reasonably sturdy so that the sides remain straight and the corners at 90 degrees. The one I used was from my daughter’s nappy delivery from amazon.If you want to have the legs hanging over the edge like I did then place the box on some sort of flat surface, I used my kids drawing table and had my mum right next to the box just in case my littlest decided to dive out. Safety first!
Plan out your shots before you start
It’s not a bad idea to plan ahead with your images, I ended up with too many legs hanging over photos which I couldn’t use because they would end up dangling in the face of one of my other images. If you have multiple subjects try and take some photos where it looks like they are facing or engaging in some way with one side of the box so that when you edit them all together they appear to be interacting with each other.
Get set up for a successful shoot
Using a tripod to keep a consistent frame for your photo will make editing so much easier. **Make sure that the camera is set up so it’s shooting straight ahead to avoid any distortion of the box.
Batch edit your shots for consistency
I edited the individual images in Lightroom, I started off editing one photo and then synced the edit over all the rest of the photos. If you have changing light conditions then the “Match Total Exposure” tool in Lightroom is VERY useful. Once I had all my images edited I moved on to Photoshop.
[#cta]
Create your composite in Photoshop
The first step is to create a new image that is consistent with the dimensions of your box. For example, if you have a perfectly square box then you need to create a new image that is also square. My box was approximately 4:5 which also happens to be the dimensions of a vertical photo in Instagram.
When I had that set up I brought all the edited images that I wanted to use in to Photoshop. I created a rectangle in Photoshop that was a third of the width and a third of the length (because I wanted to have 3x3 photos) and used this to guide the resizing and placement of each of my images. Because my box wasn’t a perfect rectangle I had to use the transform tools quite a lot to correct each image
To cut out the parts of the image I didn’t want to include I applied a layer mask to each one and then painted in black to take out the unwanted parts. I used the select tool and selected the box which made the images that didn’t have legs hanging over really quick and easy to do this with. The images with the legs dangling were a bit more laborious and I just painted round the legs by hand and a really small paintbrush.
Tip: Don’t forget that you can flip images if your subject is on the wrong side, I did this with a few of them.
Once I had everything as I wanted, I saved the image and took it back in to Photoshop where I applied a few more edits like increasing the contrast and playing with the whites and blacks. And that’s it! Here is my final image:

Thanks Claire for divulging your secrets and teaching us your ways! If you don't have these LIghtroom and Photoshop skills like Claire, you can try editing the 9 different ‘in the box’ images on your smartphone and simply put the composition together using a collage app such us PicCollage. You can add some complexity to the image with the overhanging legs and arms like Claire has by using PhotoshopMix.


%20(1).png)
%20(1).png)


