Must-know techniques that will help you take better photos of beer


Nothing brings those happy hour vibes to a photoshoot like working with a beer brand. If you have landed a beer client don't celebrate too soon as bottled and canned beverages are one of the more technically challenging products to work with.
Long shoots make it difficult to keep items looking chilled and decanted drinks can quickly lose their lustre. Luckily after working with multiple brands from the world's biggest drinks companies like Heineken and AB InBev, we know a thing or two about photographing beer.
To help you succeed on your next drinks shoot we’ve rounded up a list of techniques that you can employ to keep your beer looking chilled and tempting.
Intensify the amber glow
Beer has a beautiful amber colour and it looks incredible when you enhance the look of it through a bottle or glass. To intensify the colour simply add light or hold a glow card at the back of the bottle. You can create a DIY glow card by using a piece of paper or cardboard wrapped in aluminium foil cut to match the shape of the bottle you are photographing
Want more tips on how to light bottles? We have some handy video demonstrations in our blog: How to add a beautiful backlit glow when photographing bottles

Use your phone as a backlight
Don't have an artificial light to use on set? Try your phone torch to get the same effect. Simply take a photo of your scene, then without altering the set up add your torch behind the bottle for a backlit shot.


To complete your glowing amber effect simply compose the two images in Photoshop. By adding just the backlit bottle to your initial scene you'll omit the phone and end up with an incredible amber glowing beer.

[#cta]
Enhance the condensation
No one likes a warm beer! Add an extra spray of water before you shoot to make your beer look extra refreshing. For long lasting spray simply mix equal parts water and glycerin.
For a clever way to keep your beer looking chilled and create long lasting water droplets see our blog: How to enhance condensation for ice-cold beverage photography
.avif)
Add a pinch of salt
Yes you heard us - salt! If you want to achieve the perfect foamy head on your beer then a sprinkle of salt will help it froth up again. This is perfect for a longer session on set and will keep your beer looking ultra fresh.
.avif)
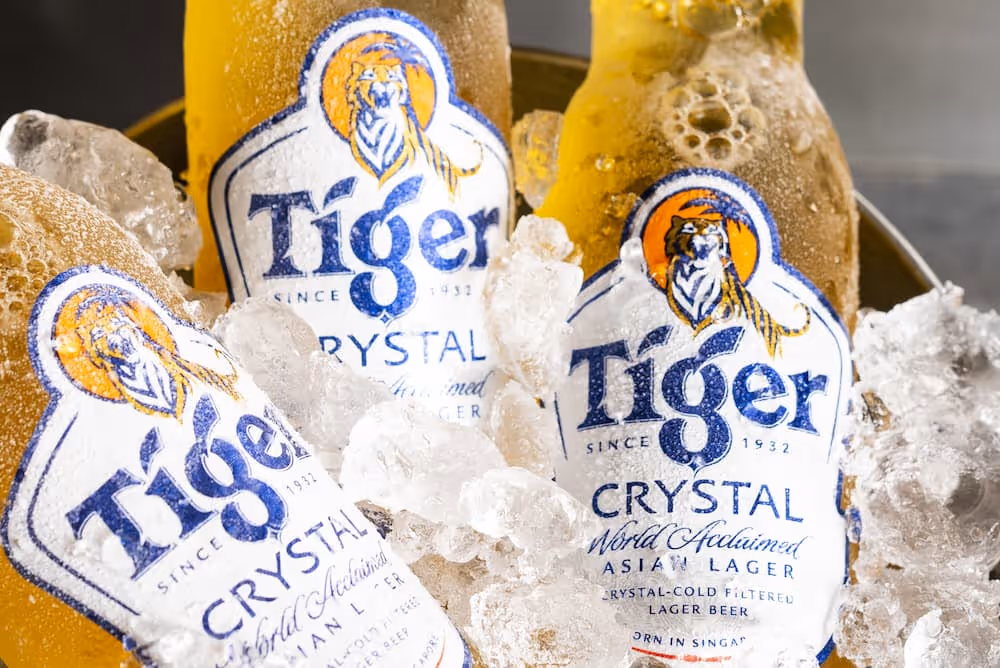
Make it frosty
Level up your condensation and add an icy frost to your bottle. The tip to getting frosty looking beers is to simply spray the outside of the bottle with water and freeze for 15-20 minutes.
Bonus tip - Remove the back label
If you aren't going to see it in shot, removing the back label will help your bottle appear brighter on set - especially if you are employing one of the backlighting techniques!
We hope you found these tips helpful, they are all very simple techniques that will have a big impact on the output from your next beverage shoot.


%20(1).png)
%20(1).png)


