Create ready to post assets with in-platform image editing


We've added a handy new editing feature to our galleries so you can take your assets from gallery to Insta grid in one simple export!
To explore this handy new feature simply open an image in your gallery and click Edit Asset. From there you'll be able to apply three styles of edits to your image:
- Transform - Crop and resize
- Text - Add text overlays
- Adjust - Change the exposure, contrast and other elements
All edits made will not effect your original image so we recommend diving in and experimenting with these new features. Read on for more details and video demonstrations.
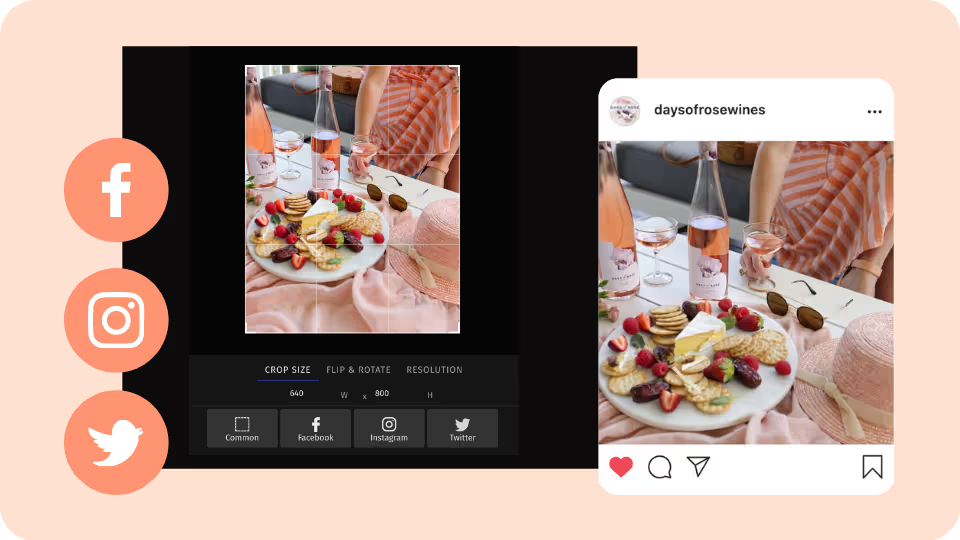
Crop and Resize Image for Social Ready Posting
The Transform option enables you to crop and resize your image so that they are upload ready for the output of your choice.
Choose from popular formats on social media channels such as Facebook, Instagram and Twitter and apply the appropriate crop for posts, stories or ads.
The channel specific formats automatically apply the optimal resolution for that platform straight to your image. This means your photo will remain the highest-quality possible and you won't face any unnecessary image compression when you upload to that channel.
Alternatively if you'd just like to crop your image but not resize for social media you can use the custom crop to define your desired resolution.
Add Core Messaging with Text Overlays
Ever wanted to add a call out or text element to your image? Now you can with the new Text feature.
Choose from a variety of on-trend fonts, customise to match your brand palette and even add coloured backdrops. Watch the video below to see this feature in action.
Enhance Image With Any Final Adjustments
If you have ever felt like an image needs a little extra touch to suit your brand aesthetic you can now tweak it right from the platform.
The Adjust feature enables you to edit the image in a non-destructive way. This means any look and feel you experiment with will only apply to the version you are working on and not affect the original gallery.
You can add basic enhancements to your image such as adding more contrast, lightening up shadows or making it appear more warm or cool.
Simple File Exporting
Once you've cropped your image and added any text or enhancements you can save your new and improved image straight to your desktop by hitting the Export button.
As mentioned above, all edits will not affect the original image so make sure you save your version of it to keep a copy on hand.
Exported files are saved as a png that are sized to the desired resolution ready to upload straight to your channel of choice.


%20(1).png)
%20(1).png)


