Compose your own flat lay in Photoshop
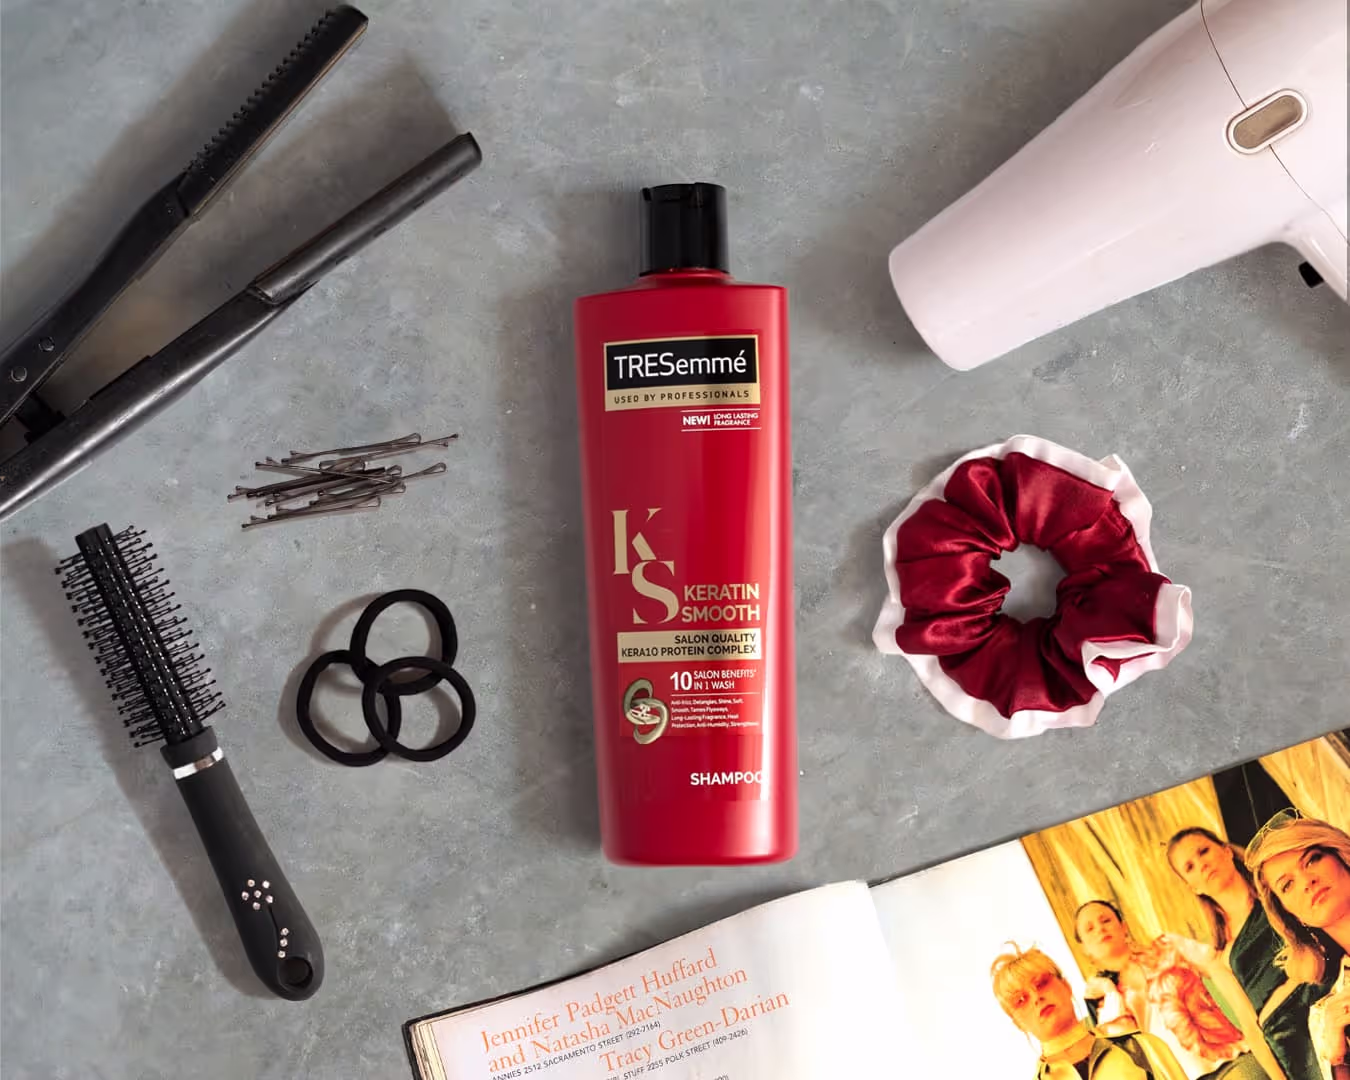
Taking flat lay style images might look simple but creating the most aesthetically pleasing compositions can often be a lot of work.
First you have to source complementary props, find the perfect lighting situation, experiment with different backgrounds, then keep rearranging the objects to ensure they look good in the shot.
What if we could show you an easier way to create the perfect composition that minimises the trial and error of physical arrangements?
Here's a handy tutorial on how to make your own flat lay in Photoshop in few easy steps!
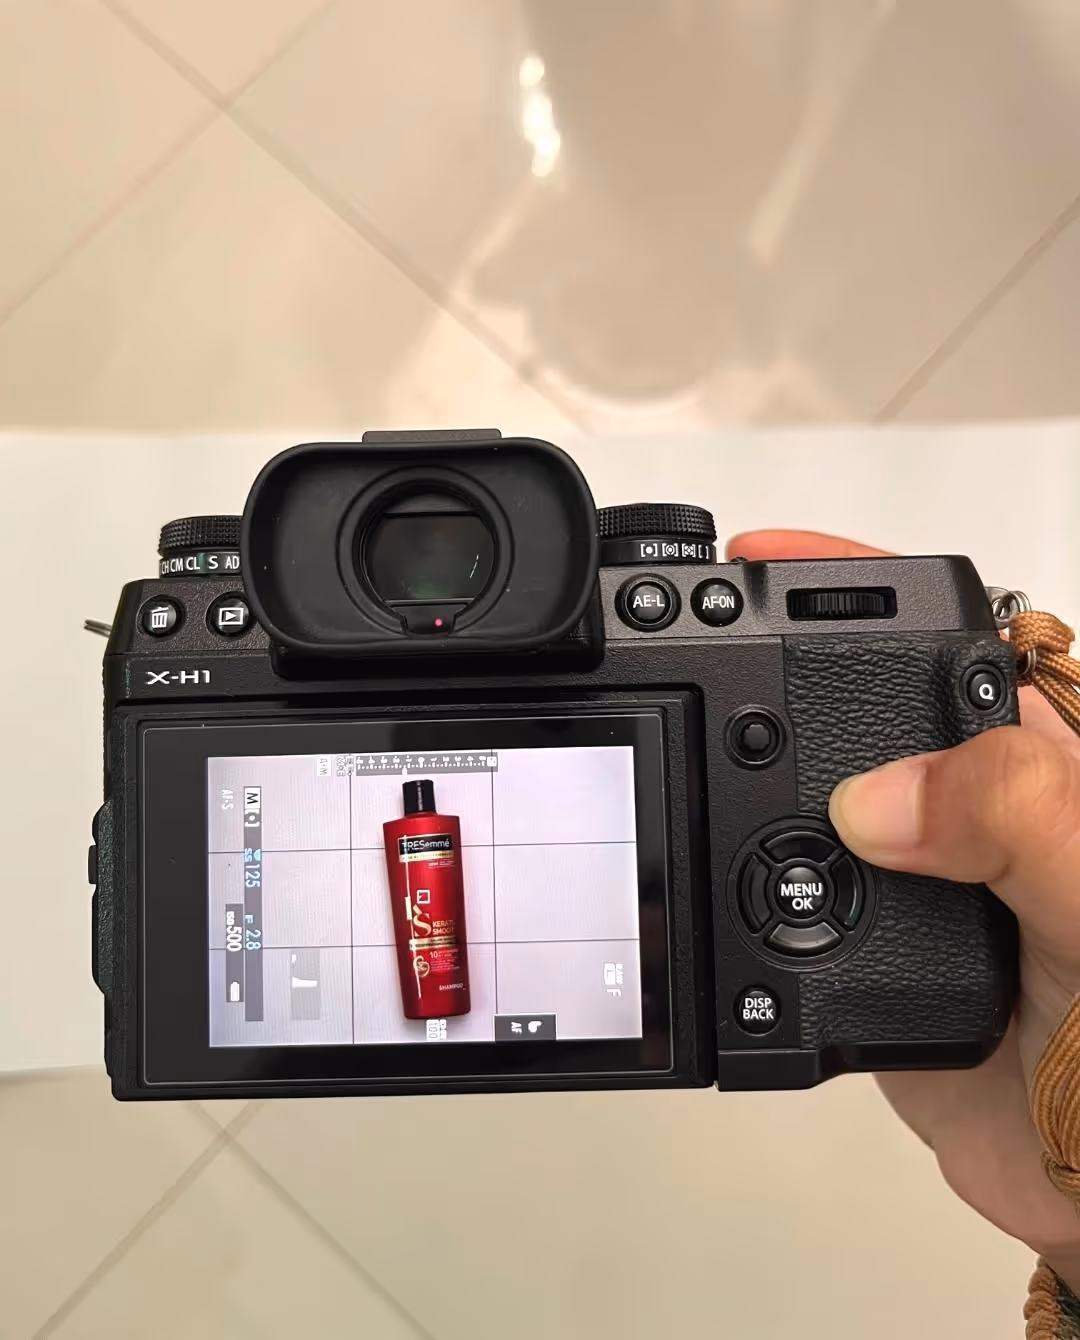
Photograph your objects on a white background
You’ll need to start by individually photographing each object that you want to include in your flat lay on a white backdrop. Use the same lighting for each item and shoot from overhead to ensure each photo is consistent with the others.
Edit your images
Open your images of each object in Photoshop to prepare them for use. You’ll need to ensure that your backdrop is pure white which you can quickly achieve using the Curves Eyedropper tool. Create a new adjustment layer then select Curves and then click on the 'Set white point' eyedropper.
Place your first object onto canvas
Copy your first object on the canvas, you can place directly on top of any background image that you've sourced online.
After placing your object on the canvas, Duplicate the layer (Cmd+J for Mac / Ctrl+J for Windows) and apply a layer mask to just the top layer using the Quick Selection tool.
Multiply the shadow
After masking the top layer you’ll want to convert the underneath layer into your shadow. To do this simply set the underneath layer to Multiply.
As long as the background was pure white to begin with it will simply disappear and you’ll be left with the realistic looking shadow from your original photo!
[#cta]
Refine your mask
If you can see any white fringing around masked object layer on top, you can refine your mask by clicking Select and Mask and adjusting the radius and mask borders to make it disappear.
Then group both layers into a folder and label them to the name of the object to make it easier for you to identify them when other objects are already placed on the canvas.
Repeat and arrange
You can now repeat this process for the rest of the objects you photographed and move them around as you see fit.
Now you can change your backdrops
It’s simple to experiment with different looks and aesthetics of backdrops on your image. You can search for free wallpapers online, try stock sites such as Unsplash or even photograph your own surfaces.
.gif)
and create different compositions!
As long as you can keep everything on roughly the same angle (to maintain consistent shadows) you’ll be able to move all of your objects around to create an unlimited number of compositions!
.gif)


%20(1).png)
%20(1).png)


