Add dramatic shadows to your product photos with this easy trick

.avif)


If you've been looking for a way to give your product photos more depth and drama, look no further! This tutorial will teach you a simple trick to add dramatic shadows to your images using Adobe Photoshop. This method is very flexible and allows you to add shadows exactly where you want them.
Step 1: Select the Shadow Areas
Firstly, you'll need to decide which areas of your image will be in shadow. To do this, open your photo in Photoshop and select the Polygon Lasso Tool from the toolbar on the left.
Carefully draw around the areas of the image where you want to add shadows.
Step 2: Lower the Exposure
Once you're happy with your selection, go to the 'Adjustments' panel at the right side of your workspace. Click on the 'Exposure' icon
A new layer will appear in your Layers panel with the Exposure settings. Lower the exposure until the selected areas start to darken. The amount you lower the exposure will depend on your image and the look you're aiming for.
Step 3: Soften the Shadows
Double click on the thumbnail of your Exposure layer mask (the white box next to the layer in your Layers panel) to bring up the Properties panel.
Here, you can adjust the 'Feather' slider to soften the edges of your shadows. The higher the amount, the softer and more natural your shadows will look.
[#cta]
Step 4: Add a Photo Filter
Now, let's add a touch of color to your shadows. Hold down the Command key (or Control key if you're on a Windows machine) and click on your mask to select it again.
Then, go back to the 'Adjustments' panel and click on the 'Photo Filter' icon (it looks like a camera lens). From the dropdown menu, choose a color that matches the overall color scheme of your photo. This will tint your shadows and help them blend seamlessly into the rest of your image.
Step 5: Final Adjustments
Finally, you can fine-tune your shadows by adjusting the opacity of each Adjustment layer. In the Layers panel, click on the arrow next to 'Opacity' and use the slider to reduce or increase the intensity of your shadows and the photo filter.
Before and After
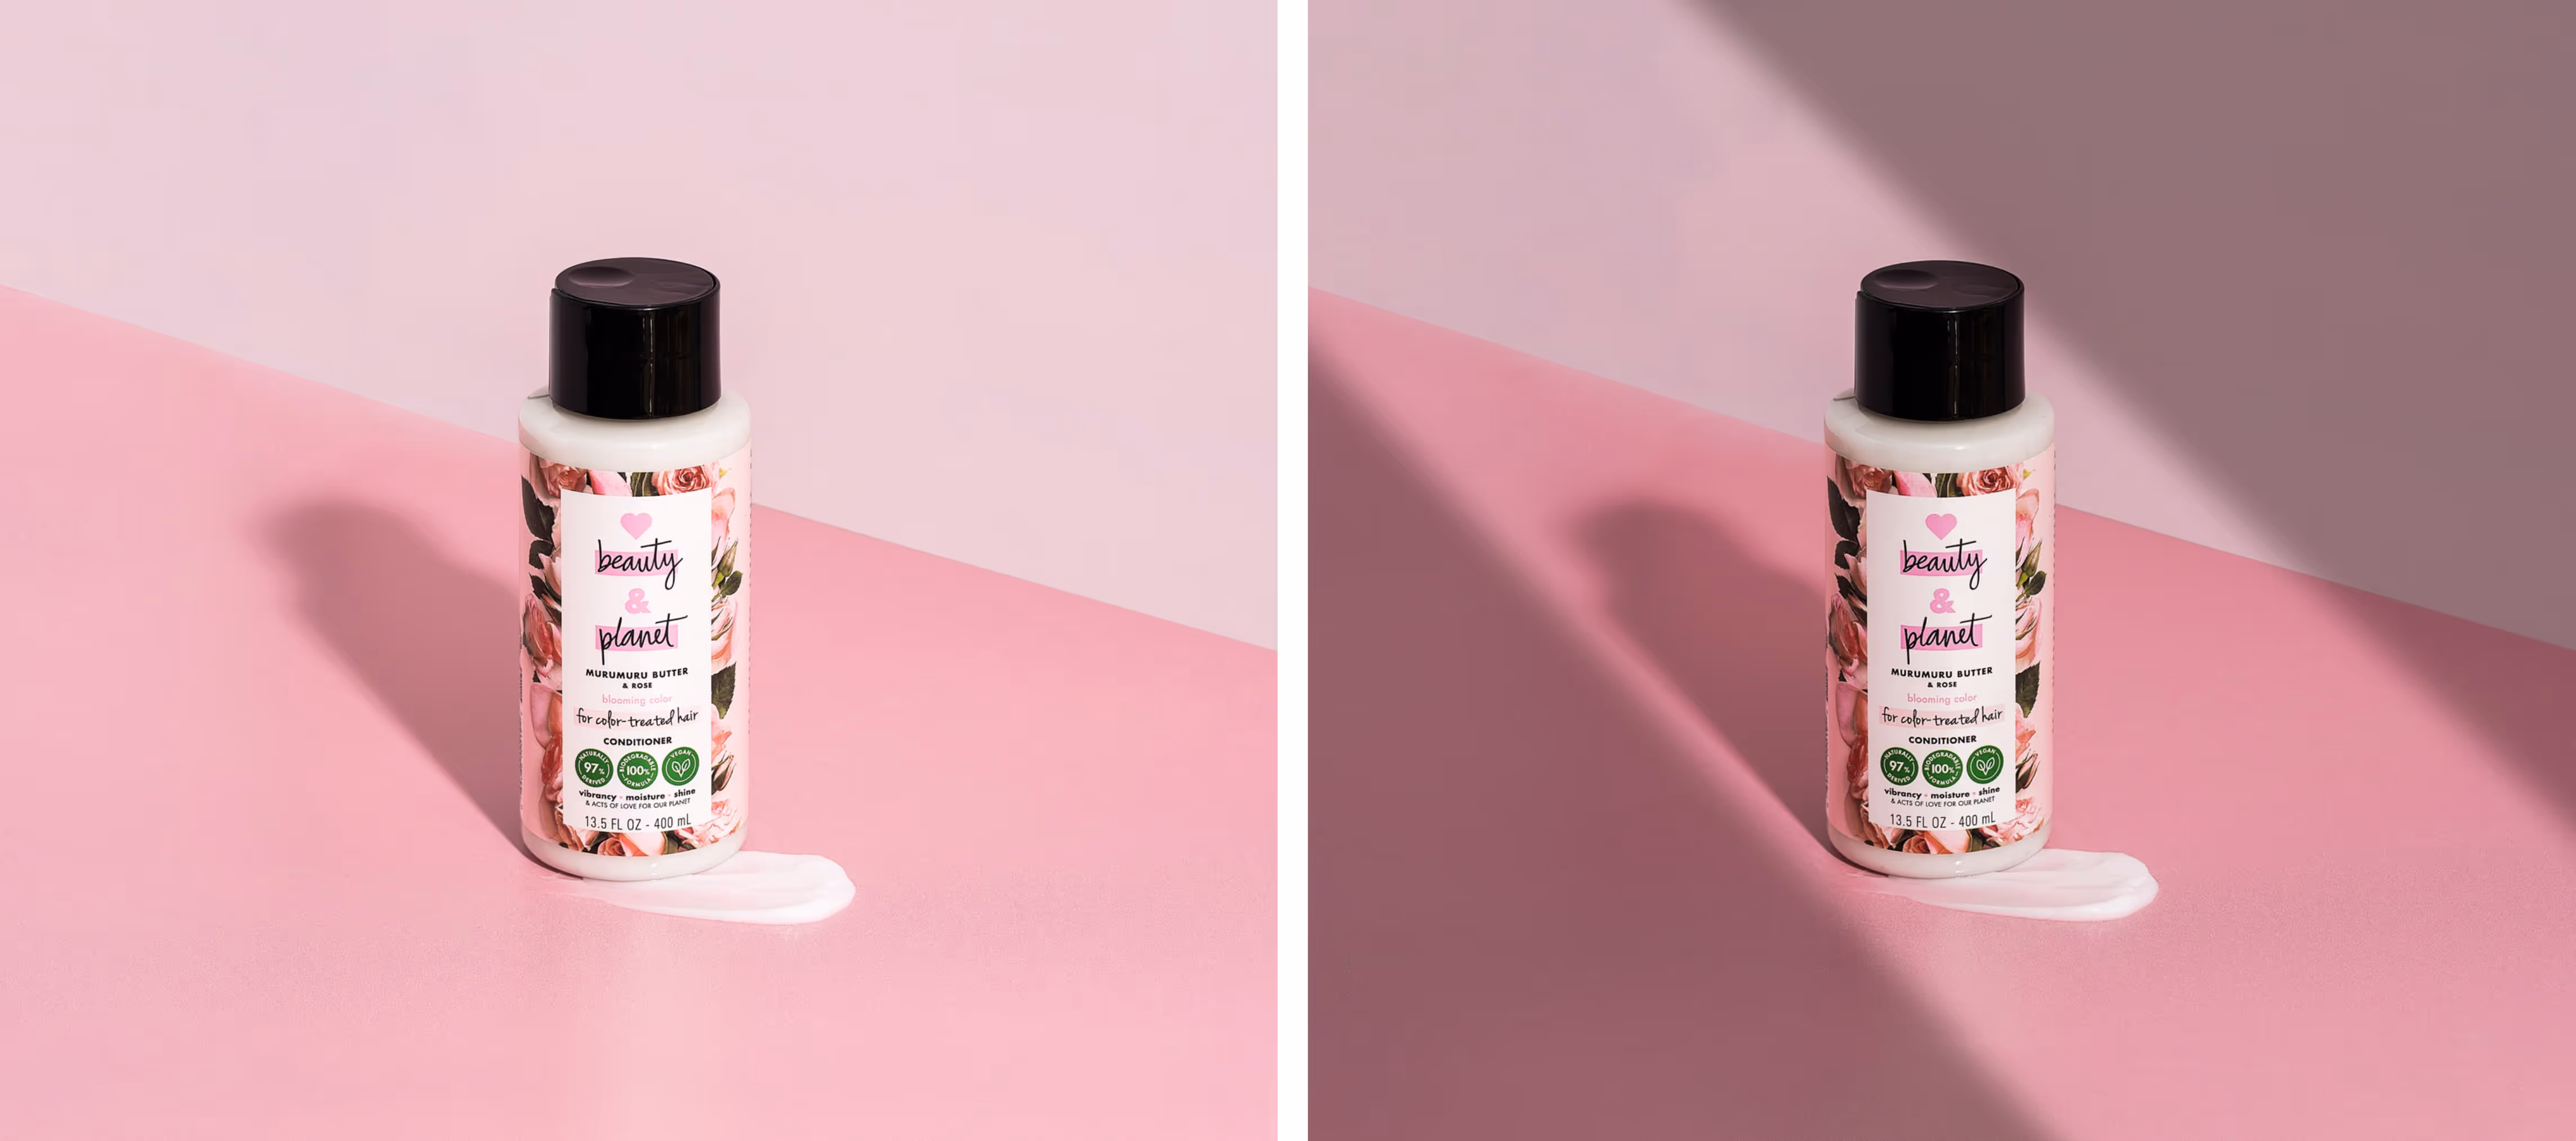
And there you have it! With just a few simple steps, you've added dramatic, natural-looking shadows to your product photos. Keep practicing this technique and before you know it, you'll be adding a touch of drama to all your images! Happy editing!


%20(1).png)
%20(1).png)


