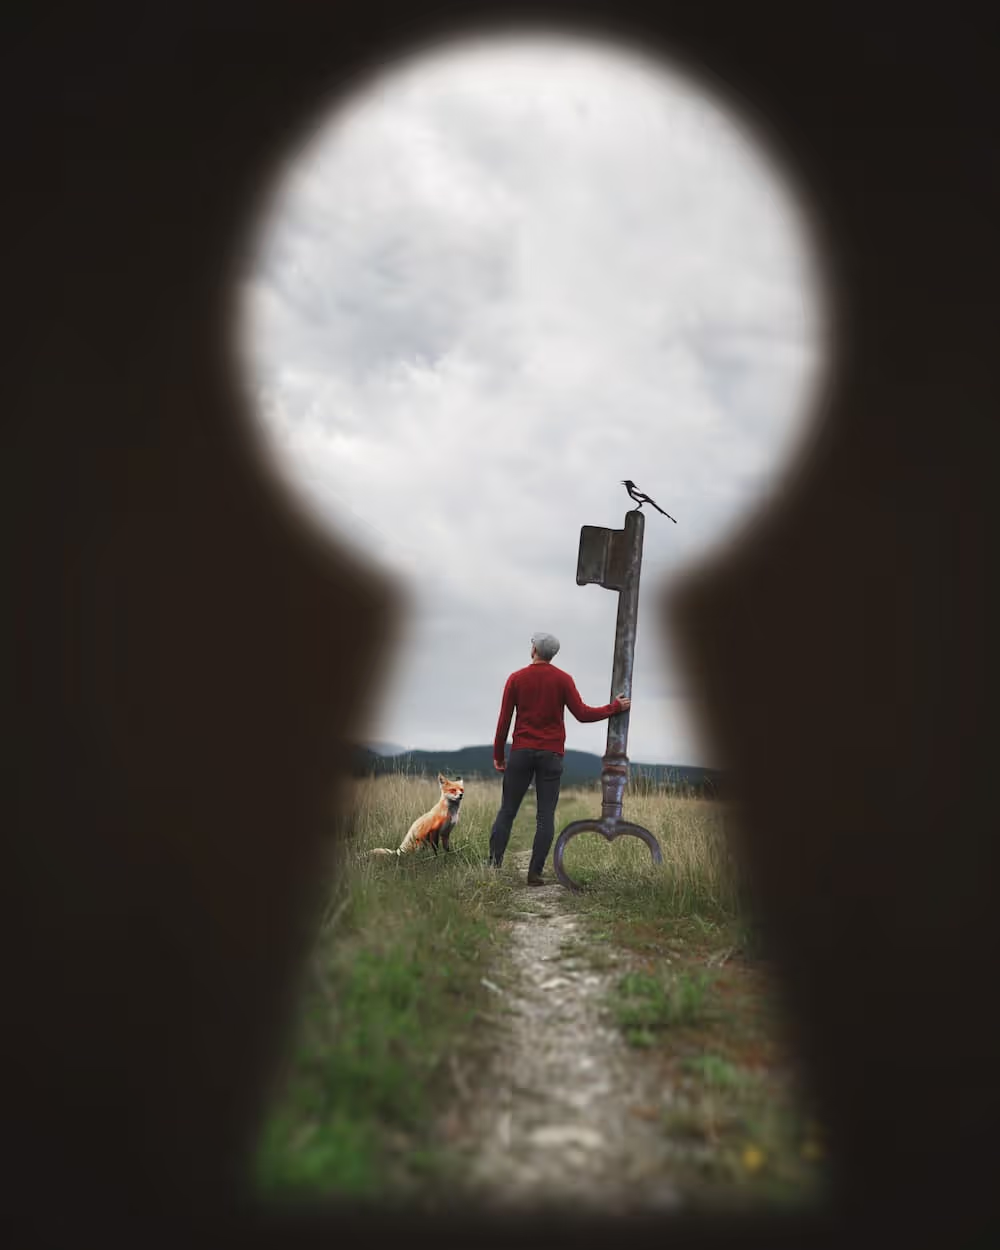
Add depth and drama to your image with three imaginative editing techniques

Joel Robison is a Canadian creator known for his creative and conceptual photographs that capture his viewers' imagination. To craft his whimsical visual stories, Joel uses Photoshop to take his self-portraits on larger-than-life adventures.
Photo editing software like Photoshop opens up a world of creative possibilities and even the most simple edits and effects can have an impressive impact on your images.
Joel has kindly shared three simple techniques that you can apply to add depth and drama to your next creative image in Photoshop. Watch him demonstrate each technique and discuss how the effects can enhance your compositions.
Highlight your subject matter with a vignette
This simple Photoshop technique creates a frame around your image using a vignette. Adding this effect darkens the edges of your image and helps draw your viewer's eye towards the centre. It is a clever way to highlight the focal point of your composition and add impact to your subject matter.
How to add a vignette to your image in Photoshop
- Click on Layer in the top navigation, then New Fill Layer and select **Gradient
- Select Multiply from the Mode drop down selection
- In the Gradient Fill popup window, change the Style dropdown to Radial
- Click the checkmark at the Reverse box to have the gradient fill go from transparent to dark
- Click on the gradient panel at the top to bring up a colour selector to change the black to another tone of your choice, then hit OK
- In the Layers panel you can adjust the overall opacity of your Gradient Fill Layer to make it more subtle

[#cta]
Add depth to your image by adding a foreground
This technique in Photoshop allows you to create depth of field and draw to attention the centre of your image. By blurring out the foreground objects you can help your viewer's eye focus on the sharpest part of the photo and highlight your subject matter.
How to add foreground elements in Photoshop
- Start by adding your element onto a new layer in your composition
- Because the item will appear closest to the camera you will need to enlarge it and place it slightly out of frame as if the viewer is looking past it into the image.
- Next you'll want to pull it out of focus by adding a blur effect. To do this click Filter from the main menu bar then Blur and select Gaussian Blur
- In the pop-up Gaussian Blur window, adjust the blur effect then hit OK. This will create a realistic depth of field by making the foreground appear soft and defocused.
- To replicate this effect in different parts of your composition simply Duplicate the layer (Ctrl+J for Win or Cmd+J for Mac) then arrange the items around the edge of your photo. You can also experiment by placing other elements that help tell the story of your scene.

Add drama and whimsy with a creative frame
This creative framing technique helps add context to your scene and draw attention to the centre of your composition. With this effect, you'll be forcing the idea of depth of field to frame your element and to really allow the eye to focus on your subject matter.
How to add a creative frame in Photoshop
- Find an image of the shape you wish to look through in your image, in this example we are using a keyhole which adds context to our subject matter.
- Use your favourite Selection Tool to select the inner part of the image then remove it by hitting the Delete key. You should now have a frame with an open window in the middle.
- Next select your frame by pressing Ctrl + A (or Cmdl + A for Mac) then Ctrl + C to copy and paste that selection/outline to your main image
- To change the colour of your frame, select the colour you want and fill the outer area of your shape using the Paint Bucket Tool
- Next you'll want to take it out of focus to create a realistic depth of field. To do this click Filter on the main menu bar then Blur and select Gaussian Blur, and then slightly adjust the blur
- You'll notice the outer edges will blur as well so to hide this you can simply enlarge your shape to have the edges cropped out of frame.
- To enhance the shadowy look of your frame you can darken the colour using any tools in the Adjustment Panel. In this example we used Levels by pressing Ctrl + L (or Cmdl + L for Mac) to open up the ****panel ****and darken the image from there

Thank you to Joel Robison for sharing these great creative techniques with us. They are simple to execute effects and have great impact on drawing attention to the subject of our images.
If you'd like to find out more about Joel and his creative journey so far you'll enjoy our interview with him Inspiring Creator Series: Joel Robison


%20(1).png)
%20(1).png)


